
How To Make Your Own Motorized Bicycle
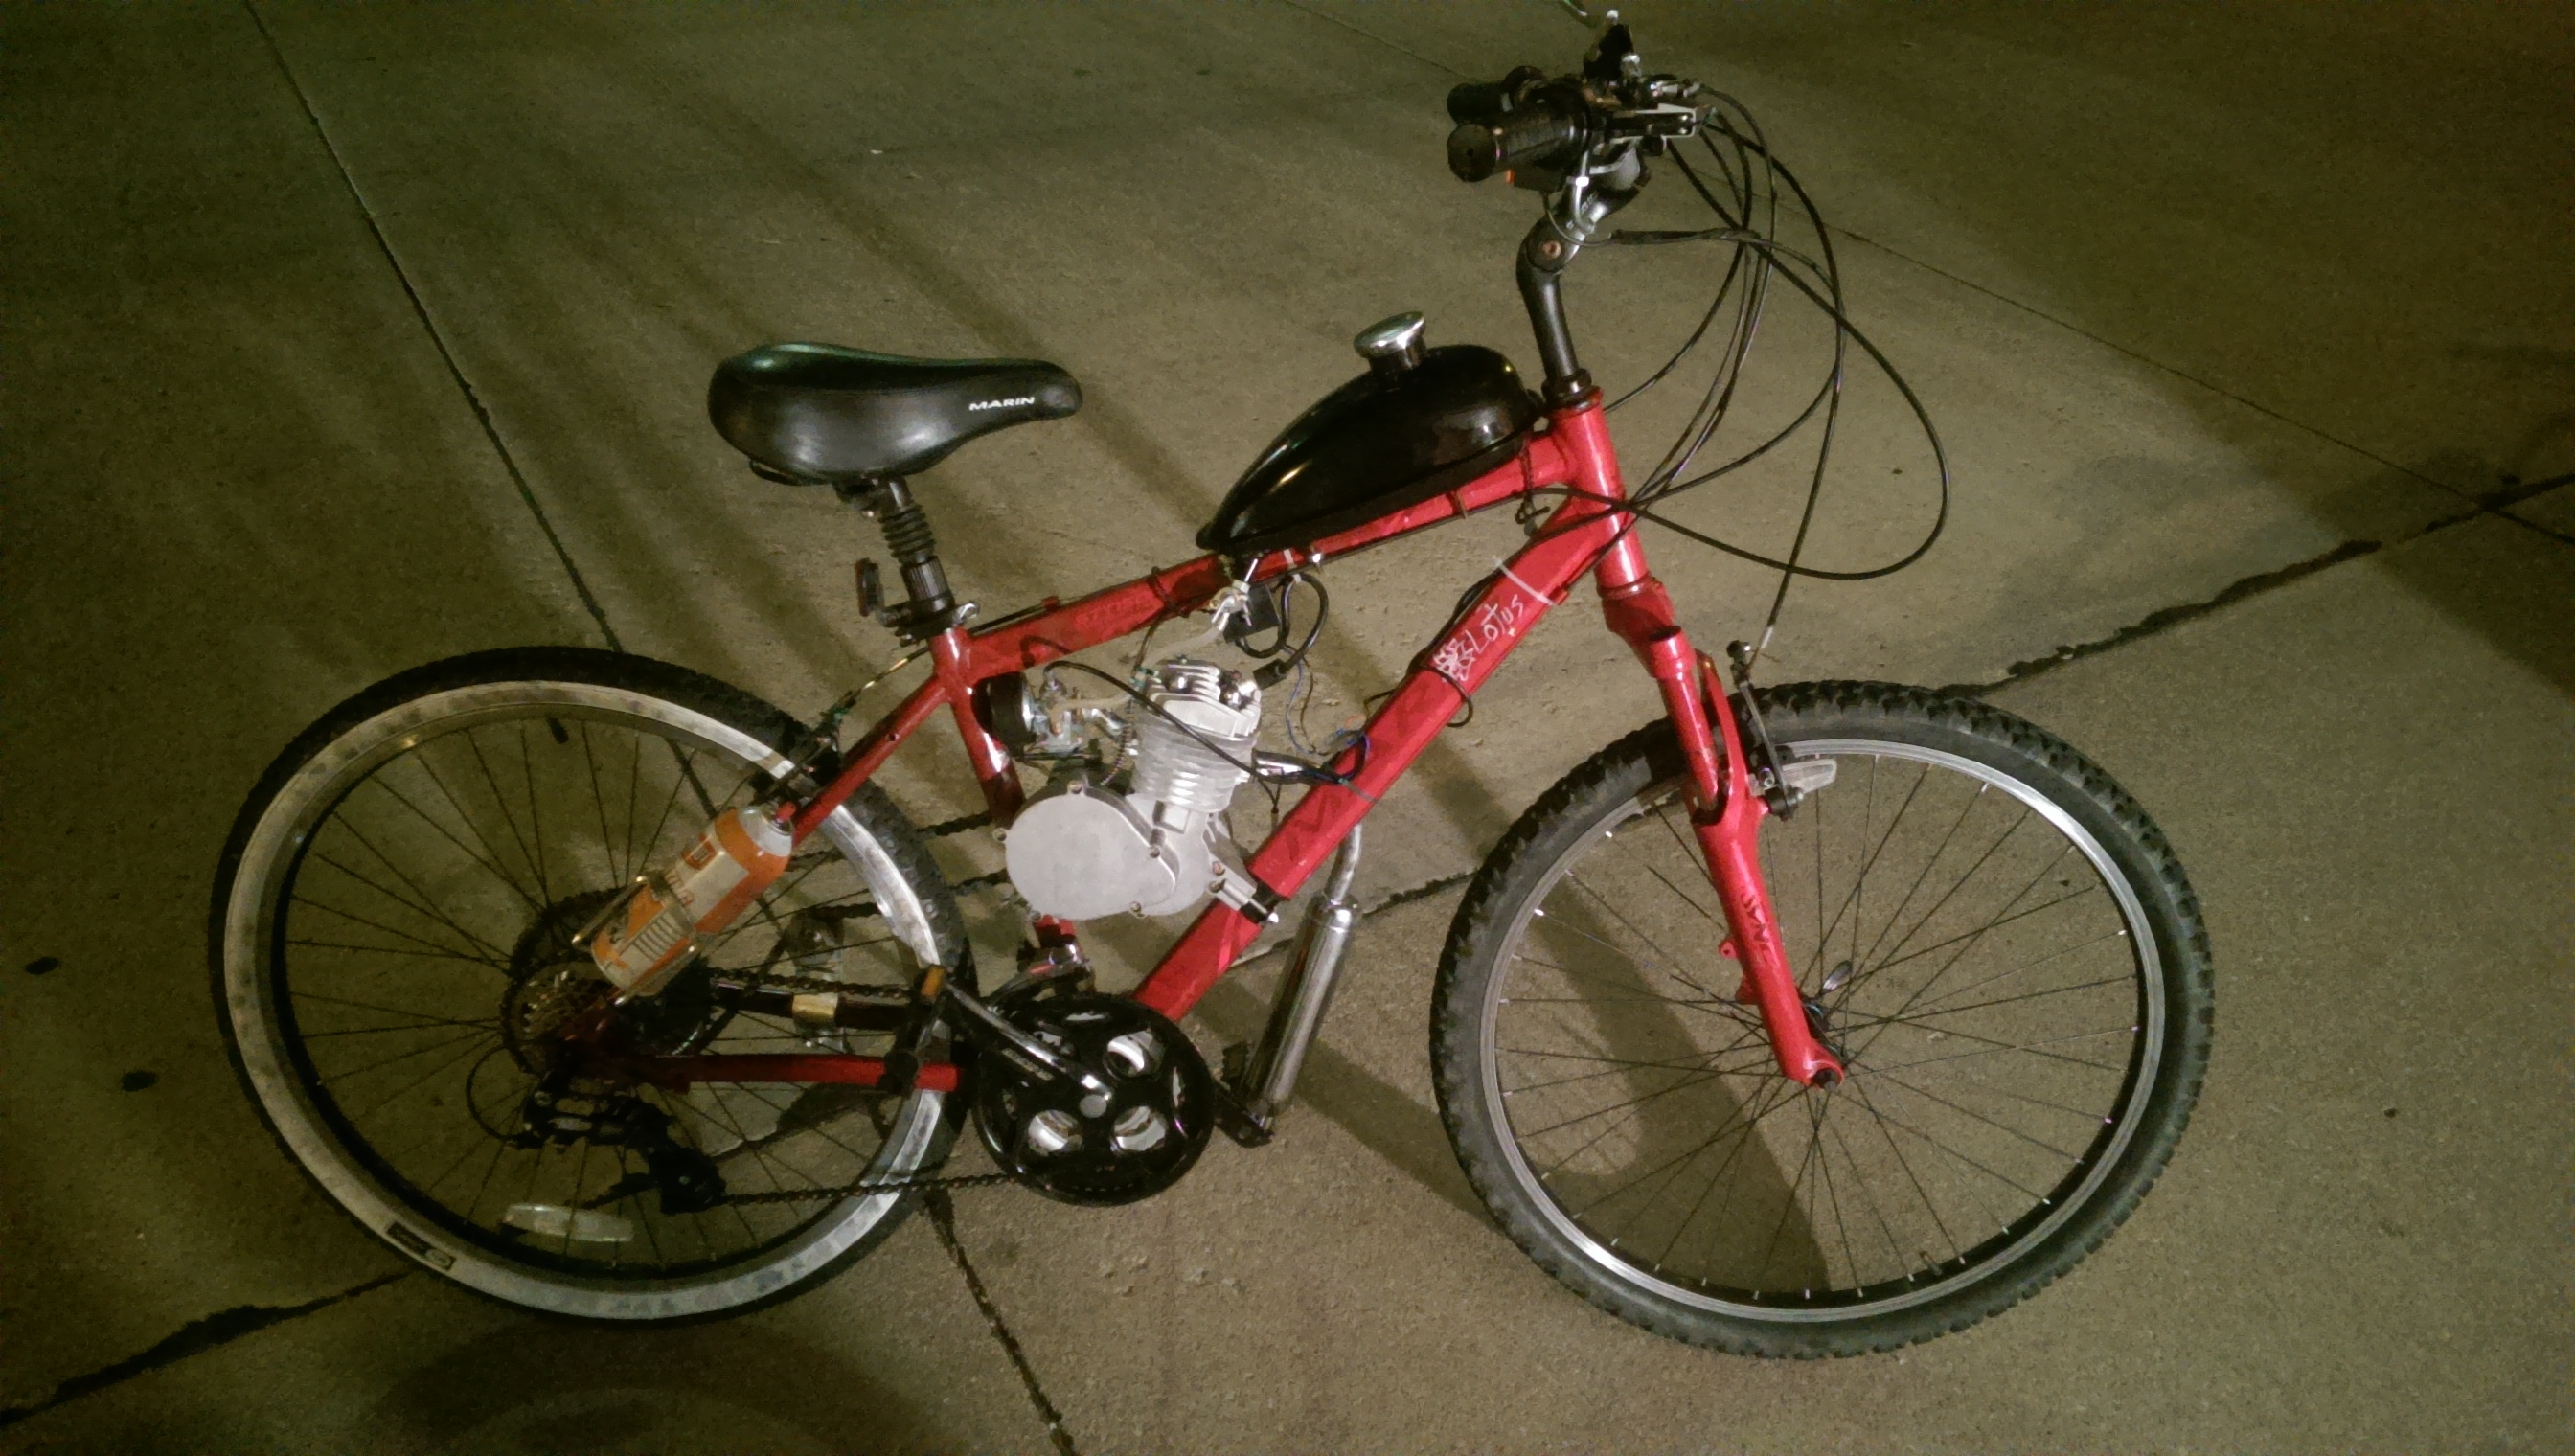
“My very own, home built, motorized bike” The thought was so enticing. It’s a childhood dream.
At first I thought that I wouldn’t be able to build one with my, somewhat, lacking knowledge of the workings of a motor. I was tempted to buy a pre-built one from somewhere, but I wanted the personal experience. After many hours googling and reading through article after article I decided to buy a 2 cycle motor kit. Most of the kits online are the same china made kit (with small variations), so there isn’t a lot of deciding.
Once the kit is purchased, you need to choose a bicycle to convert. I used a bike I’ve had for awhile just because i already had a feel for everything and I didn’t want to buy a whole new bike. I made the initial mistake of using a bike that doesn’t have large frame space. Whatever you choose just make sure the area in the frame between the tires is bigger than 9 inches, and with a frame tube diameter around one inch.
When you get the kit it probably won’t come with instructions, but that isn’t a problem.
Benefits of a Motorized Bicycle
You might be wondering why you would want a motorized bicycle and there a number of reasons both practical and non-practical.
- Gas Mileage- You will get between 100 and 150 MPG with a motorized bicycle. These are perfect for those who have short commutes to work, or have to deal with lots of traffic.
- Unique- I’ve met tons of people who’ve come up to talk to me solely because they’ve never seen one of these bad boys before and wanted to know what it was.
- Cheap- Everything required to make a motorized bicycle can be had for less than 200$. If you live in a city or have to commute to campus you also won’t have to pay for a parking pass because you can put it in a bike rack.
- Fun- Motorized bicycles are just plain fun to ride
Materials/Supplies
- Bicycle Motor Kit
- Bicycle with 9″ between bottom and top frame tube and around 1″ frame tubing (single speed or multi speed will work)
- Socket set
- Chain breaker
- Needle Nose Pliers
- Vice-grip
- Screw Driver
- Zip ties
- 10w 30
- Gas Container
- Glass Measuring Cup
- Unleaded Gasoline
- Allen Wrenches
- Spray Lubrication
- Starter Fluid
- Marker
- Knife
Bike Prep
- Take the rear wheel off
- Take the rubber hand grips off (dispose of them if you wish)
- Take handle bar brakes and gears off
- Use the sprocket assembly that comes with the kit and attach the sprocket to the rear wheel (this takes some time to get the sprocket parallel to the wheel on the spokes)
- Cut one of the rubber circles so that it can be opened like a “C” and put inside the spokes around the middle
- Take the sprocket and the other rubber circle and hold it on the outside of the spokes against the inner rubber piece
- The three curved metal pieces go on the back of the rubber piece inside the spokes
- Put one of the metal pieces inside in the rubber and slide the bolts in and put a washer and nut loosely on the bolt
- Repeat the process until all the holes have bolts
- Tighten in a star shape and adjust so the sprocket is parallel to the wheel (don’t over tighten)
- Place rear wheel back on the bike

Motor Prep (optional but recommended)
- Remove the converter case cover (the larger flat piece with the 5 screws on the engine’s side)
- Take the motor and pour oil into the spark plug hole, into the intake manifold, and the exhaust (the three openings on the engine) until it is full
- Use a ratchet to spin the bolt clockwise inside the smaller of the two exposed gears inside the converter
- This lubricates the engine for better performance and longer life
- After 5-10 rounds of spinning (you may have an oil mess) turn the engine to drain the excess oil, spin the bolt some, drain, repeat until a good amount of the oil inserted drains out
- Lay case cover aside
- Screw the spark-plug into the engine tight but don’t over tighten
Attaching the motor
- The motor will have mounting brackets either attached or in the box
- Stand the bike so the seat is up and position the motor inside so the two connection points at the bottom of the motor are resting on the inside bottom of the frame
- Attach the mounting brackets to the two points and put on the washer, lock washer, and nut
- Tighten nuts until the engine doesn’t rock back and forth
Carburetor/Accelerator Assembly
- Unscrew the part on the carburetor with the exposed threads
- Take out the pin, spring, cylinder housing, and washer
- There are two cables, the one with the bent metal end, take the cable and place it in the cylinder
- Reassemble the carburetor and the cable should be springy when pulled
- Attach the other end of the cable to the kill switch (box with the orange button)
- The throttle hand grip attaches to the kill switch
- Lay the carburetor, kill switch, and handle aside
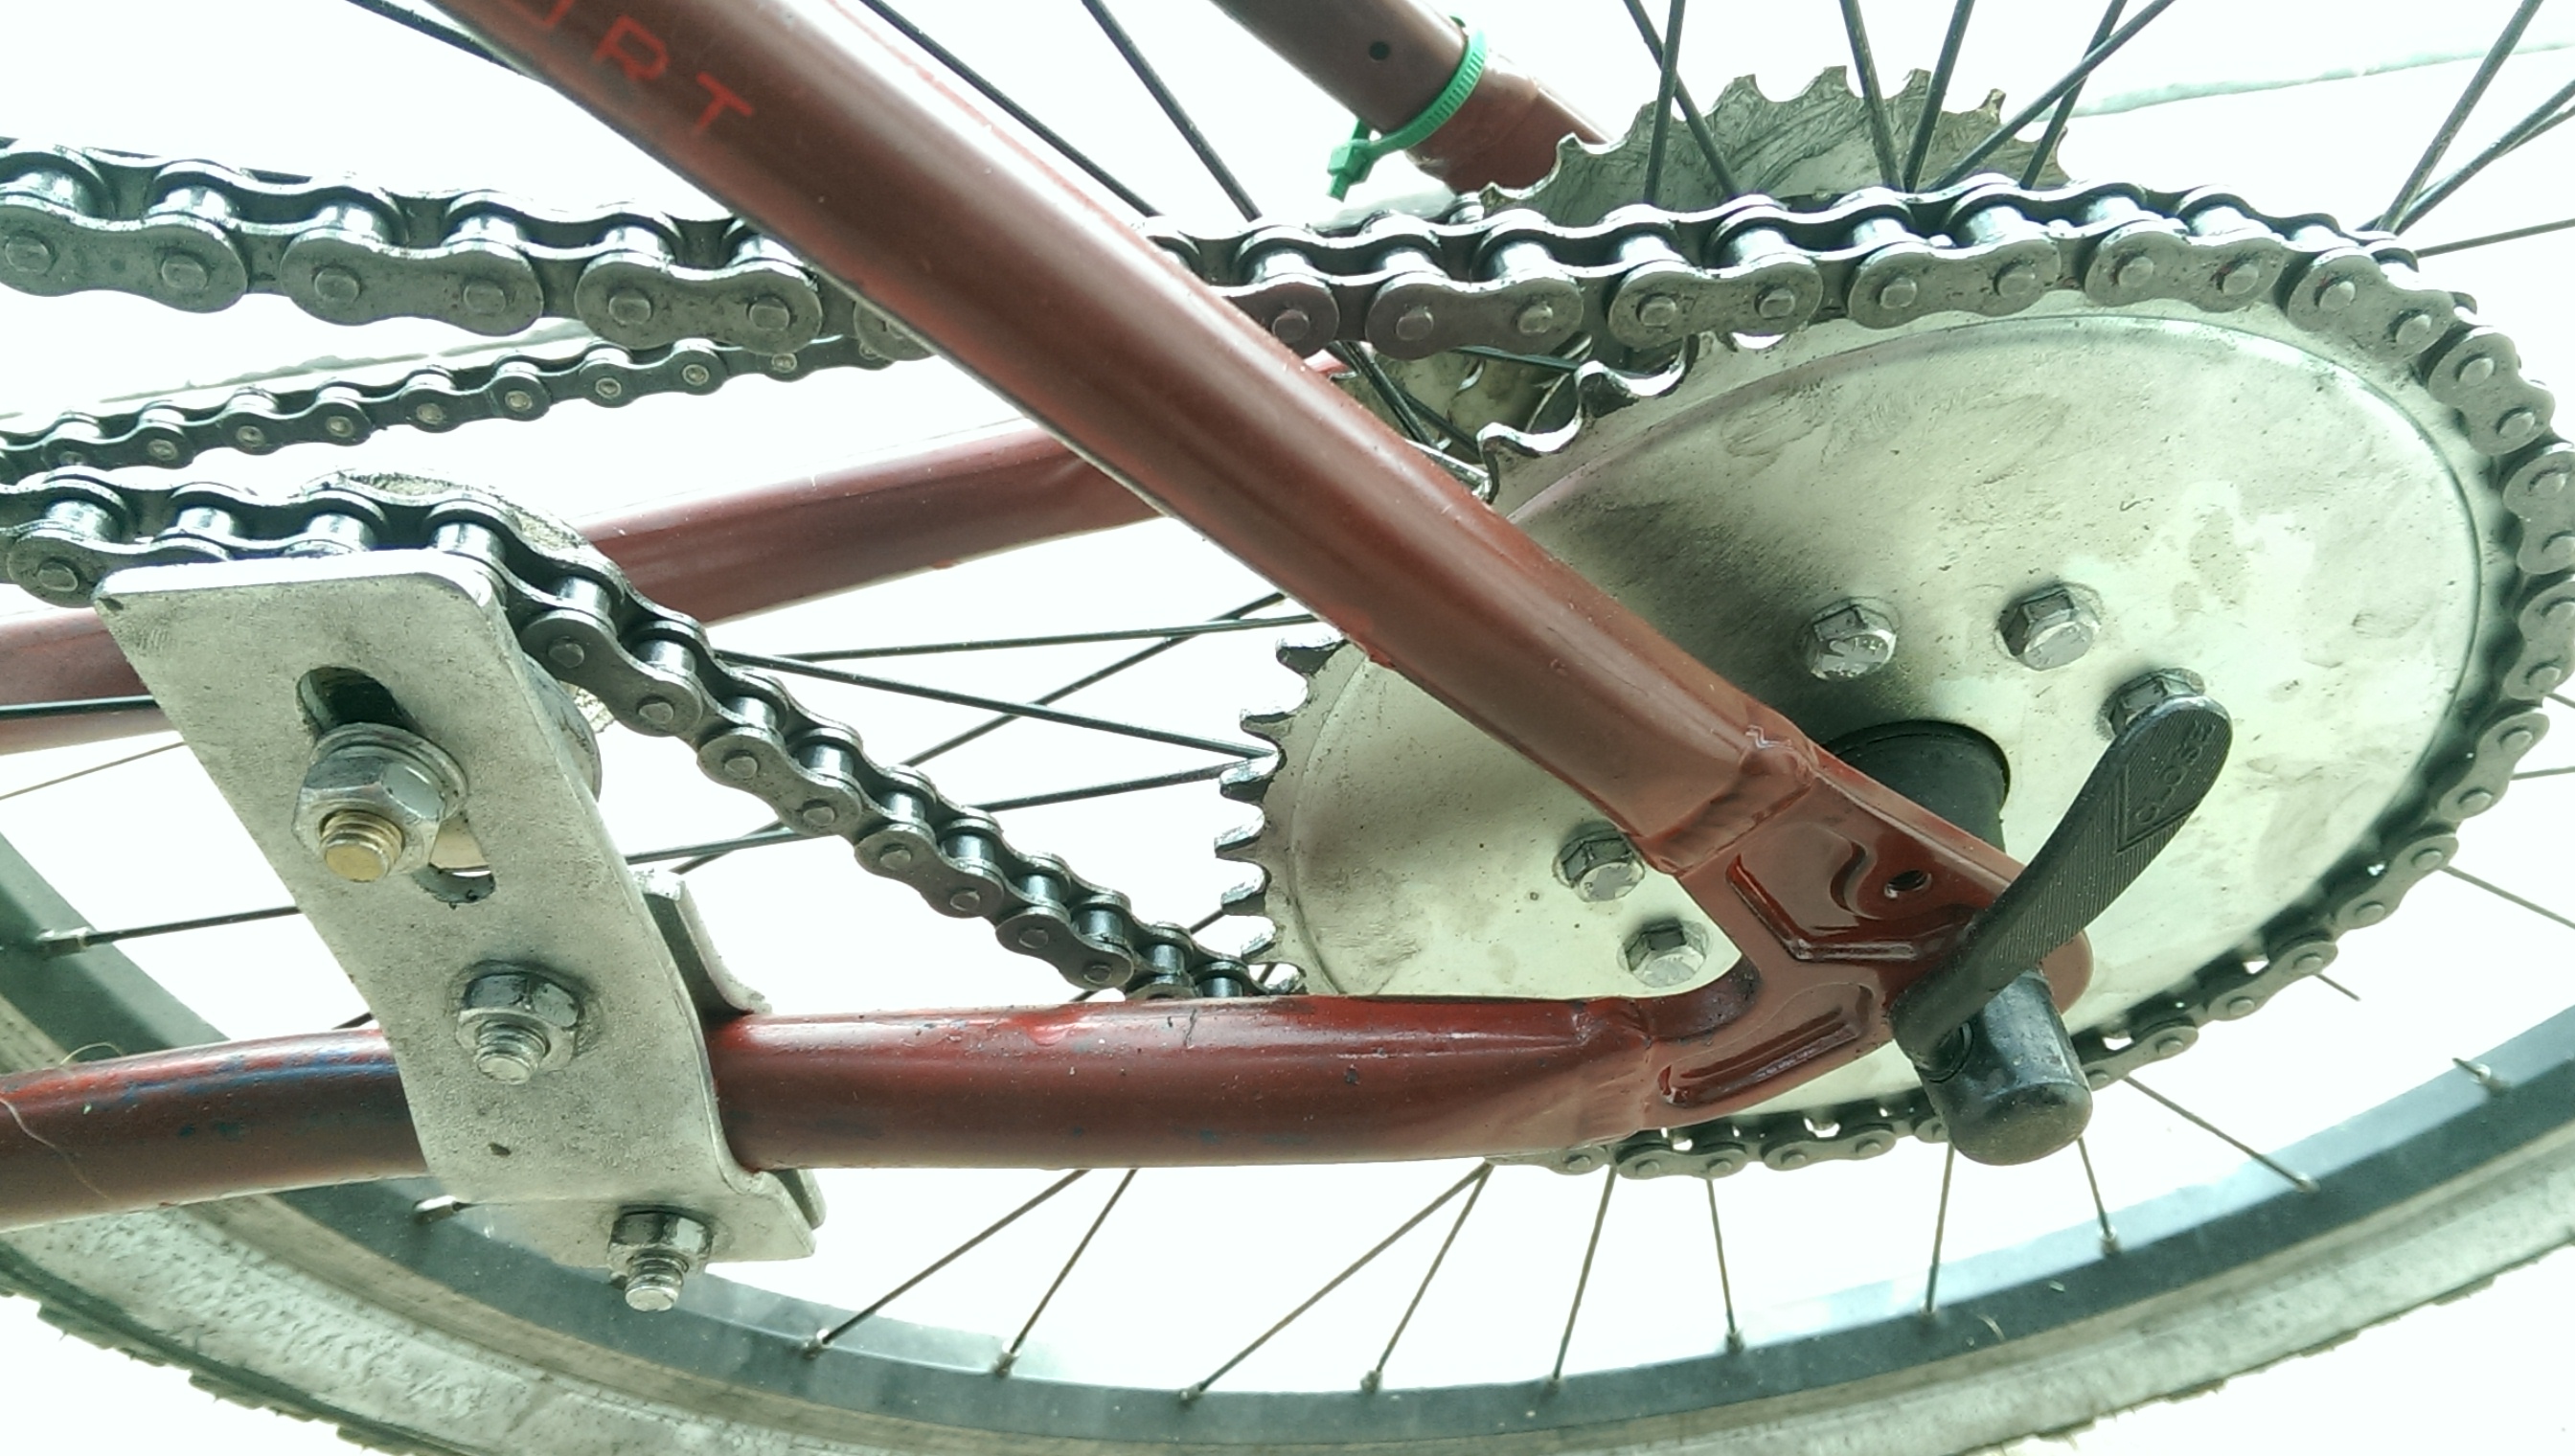
Attaching the chain
- Remove the cover from the driving sprocket on the engine
- Remove the master link from the chain so the chain is open
- Put a few links on the exposed sprocket, use a ratchet on the other side the rotate the gears clockwise, and get the chain through to the other side
- Take the higher part of the chain and run it to the rear wheel sprocket
- Pull both ends of the chain together and mark the link on one said that would make the chain tight
- Use the chain breaker to shorten the chain to the marked point
- Reattach the master link to make the chain continuous again the chain should be snug with about a half in sag on the low section
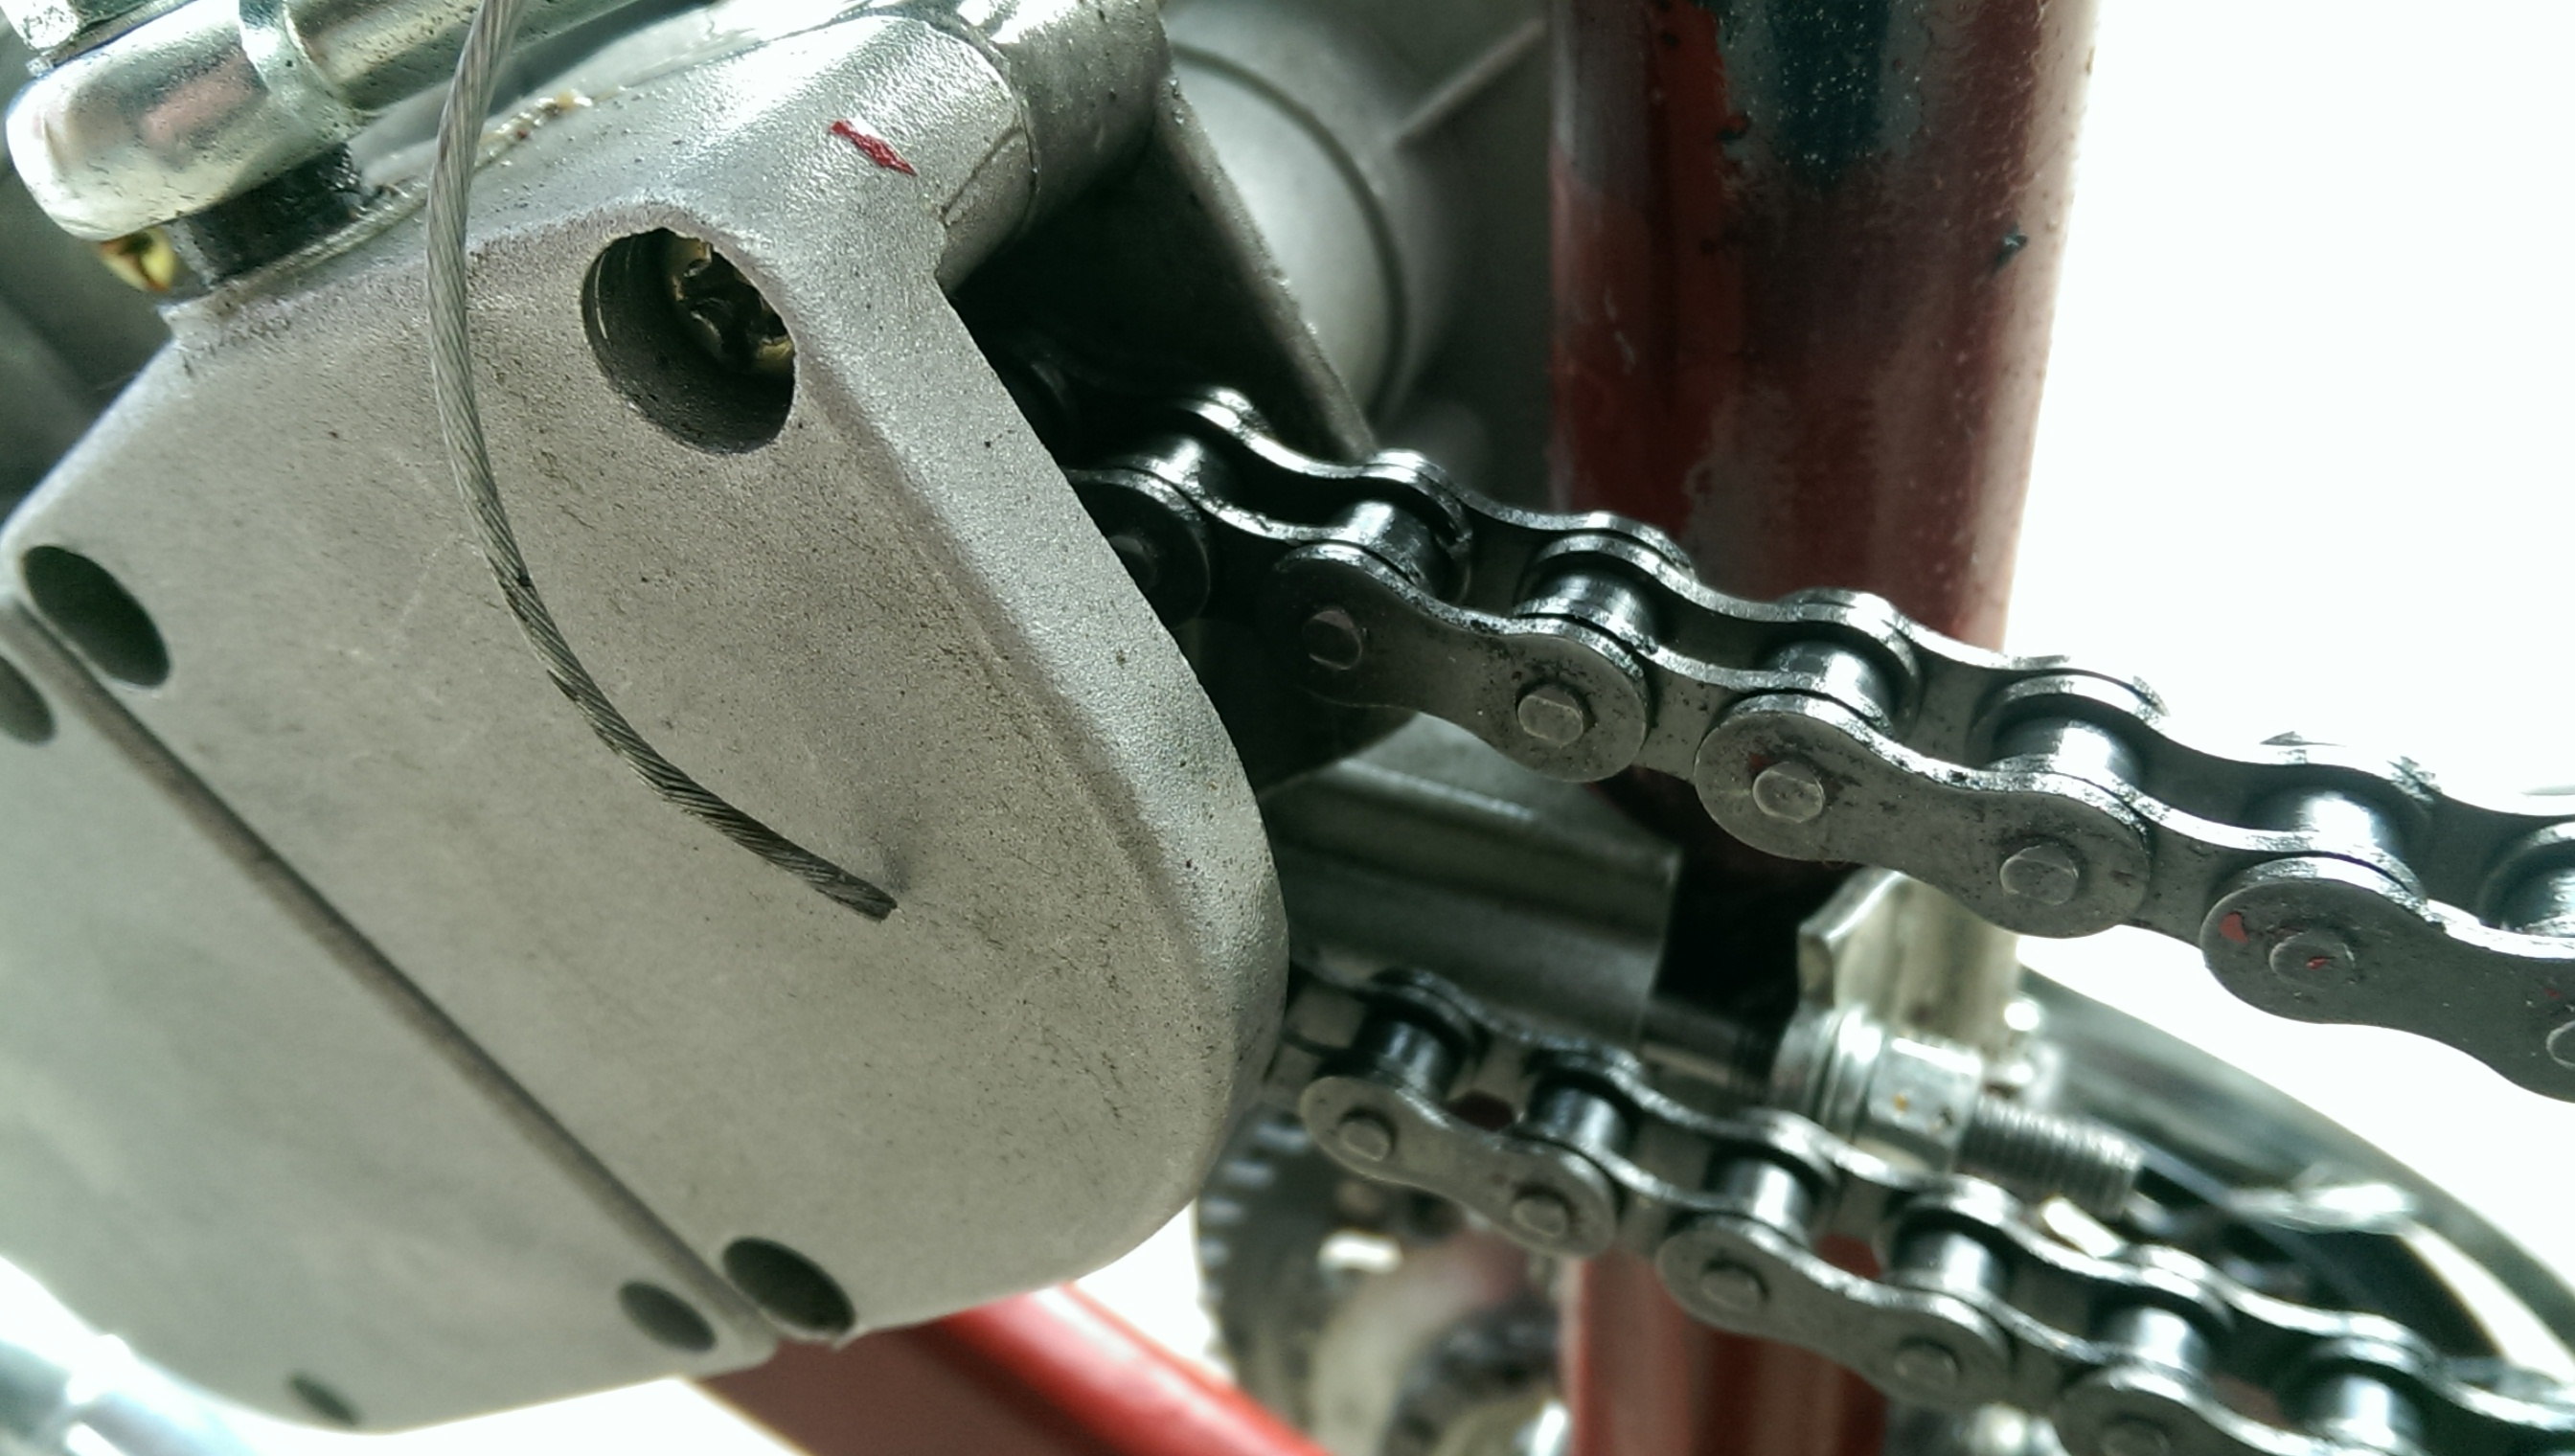
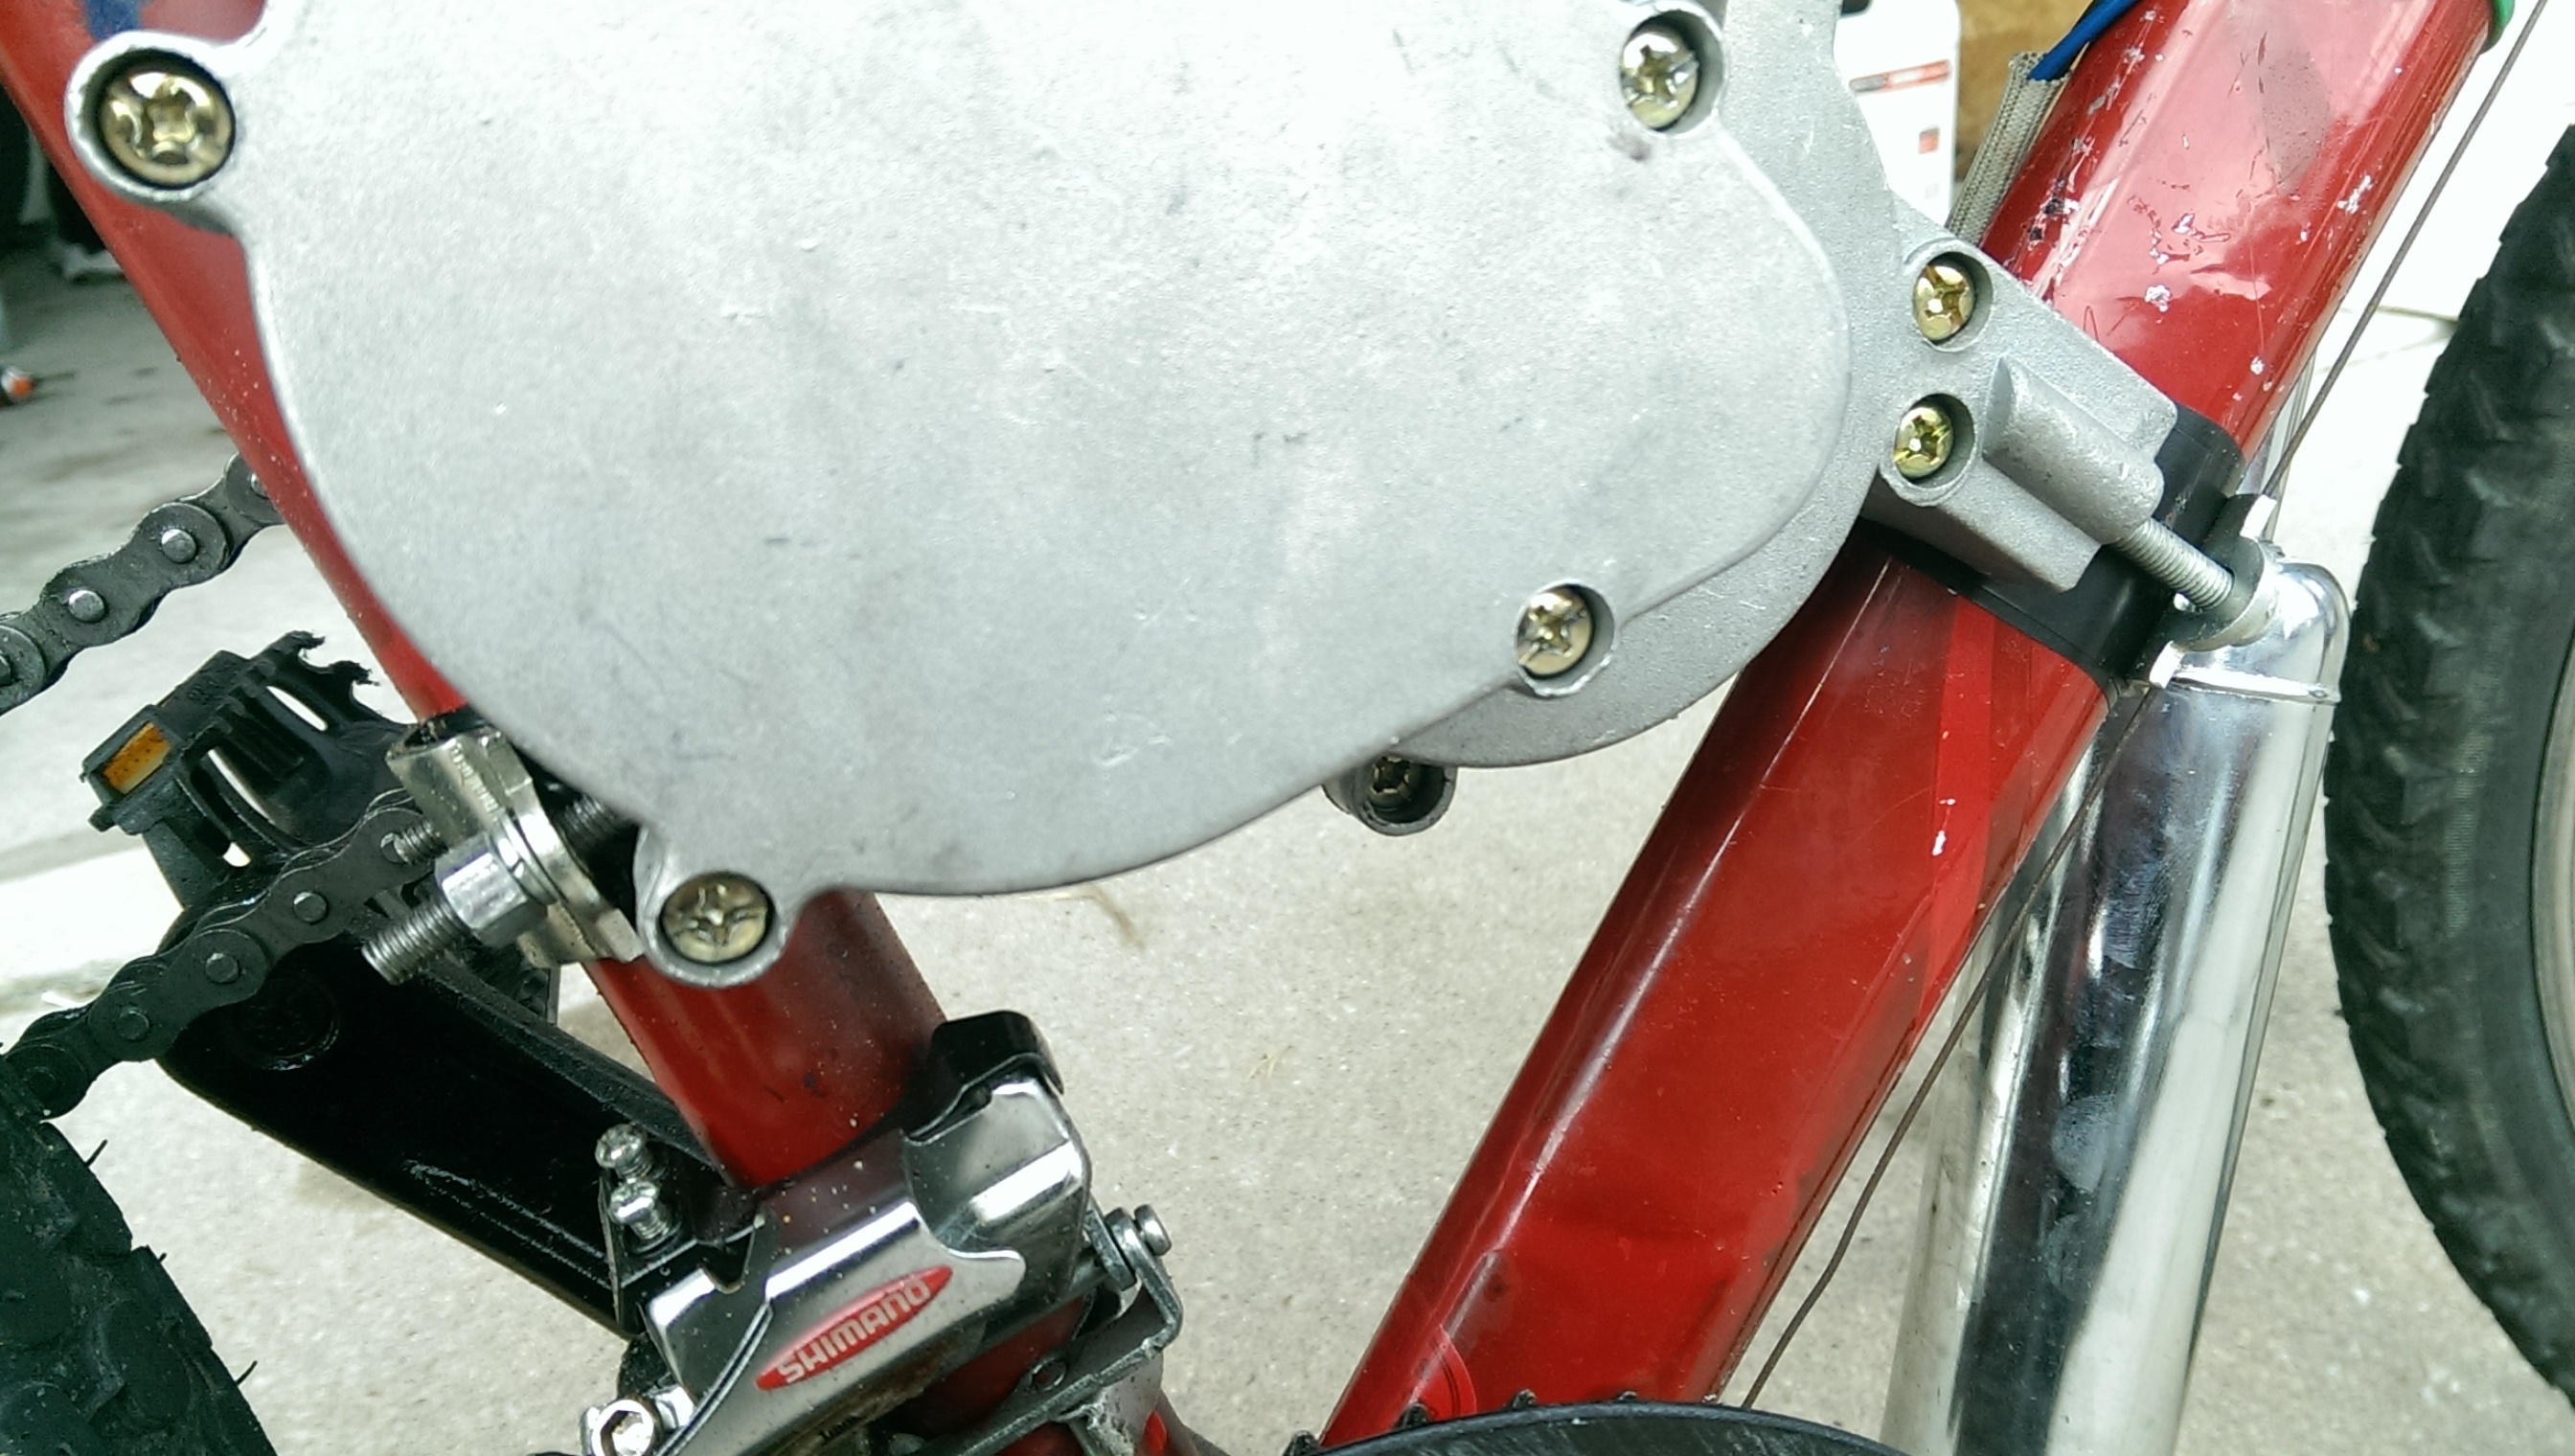
Idler Pulley/Chain Cover
- Unbolt the mounting brackets from the pullet and attach it to the frame in between the chain
- Adjust the pulley to add tension to the lower part of the chain so the chain is mostly tight with minimal sag
- Bolt the chain cover to the bolt that is sticking out in the middle of the engine area and screw a nut onto it and tighten
- For added support take a zip-tie to the other end to the frame through the hole that should be there
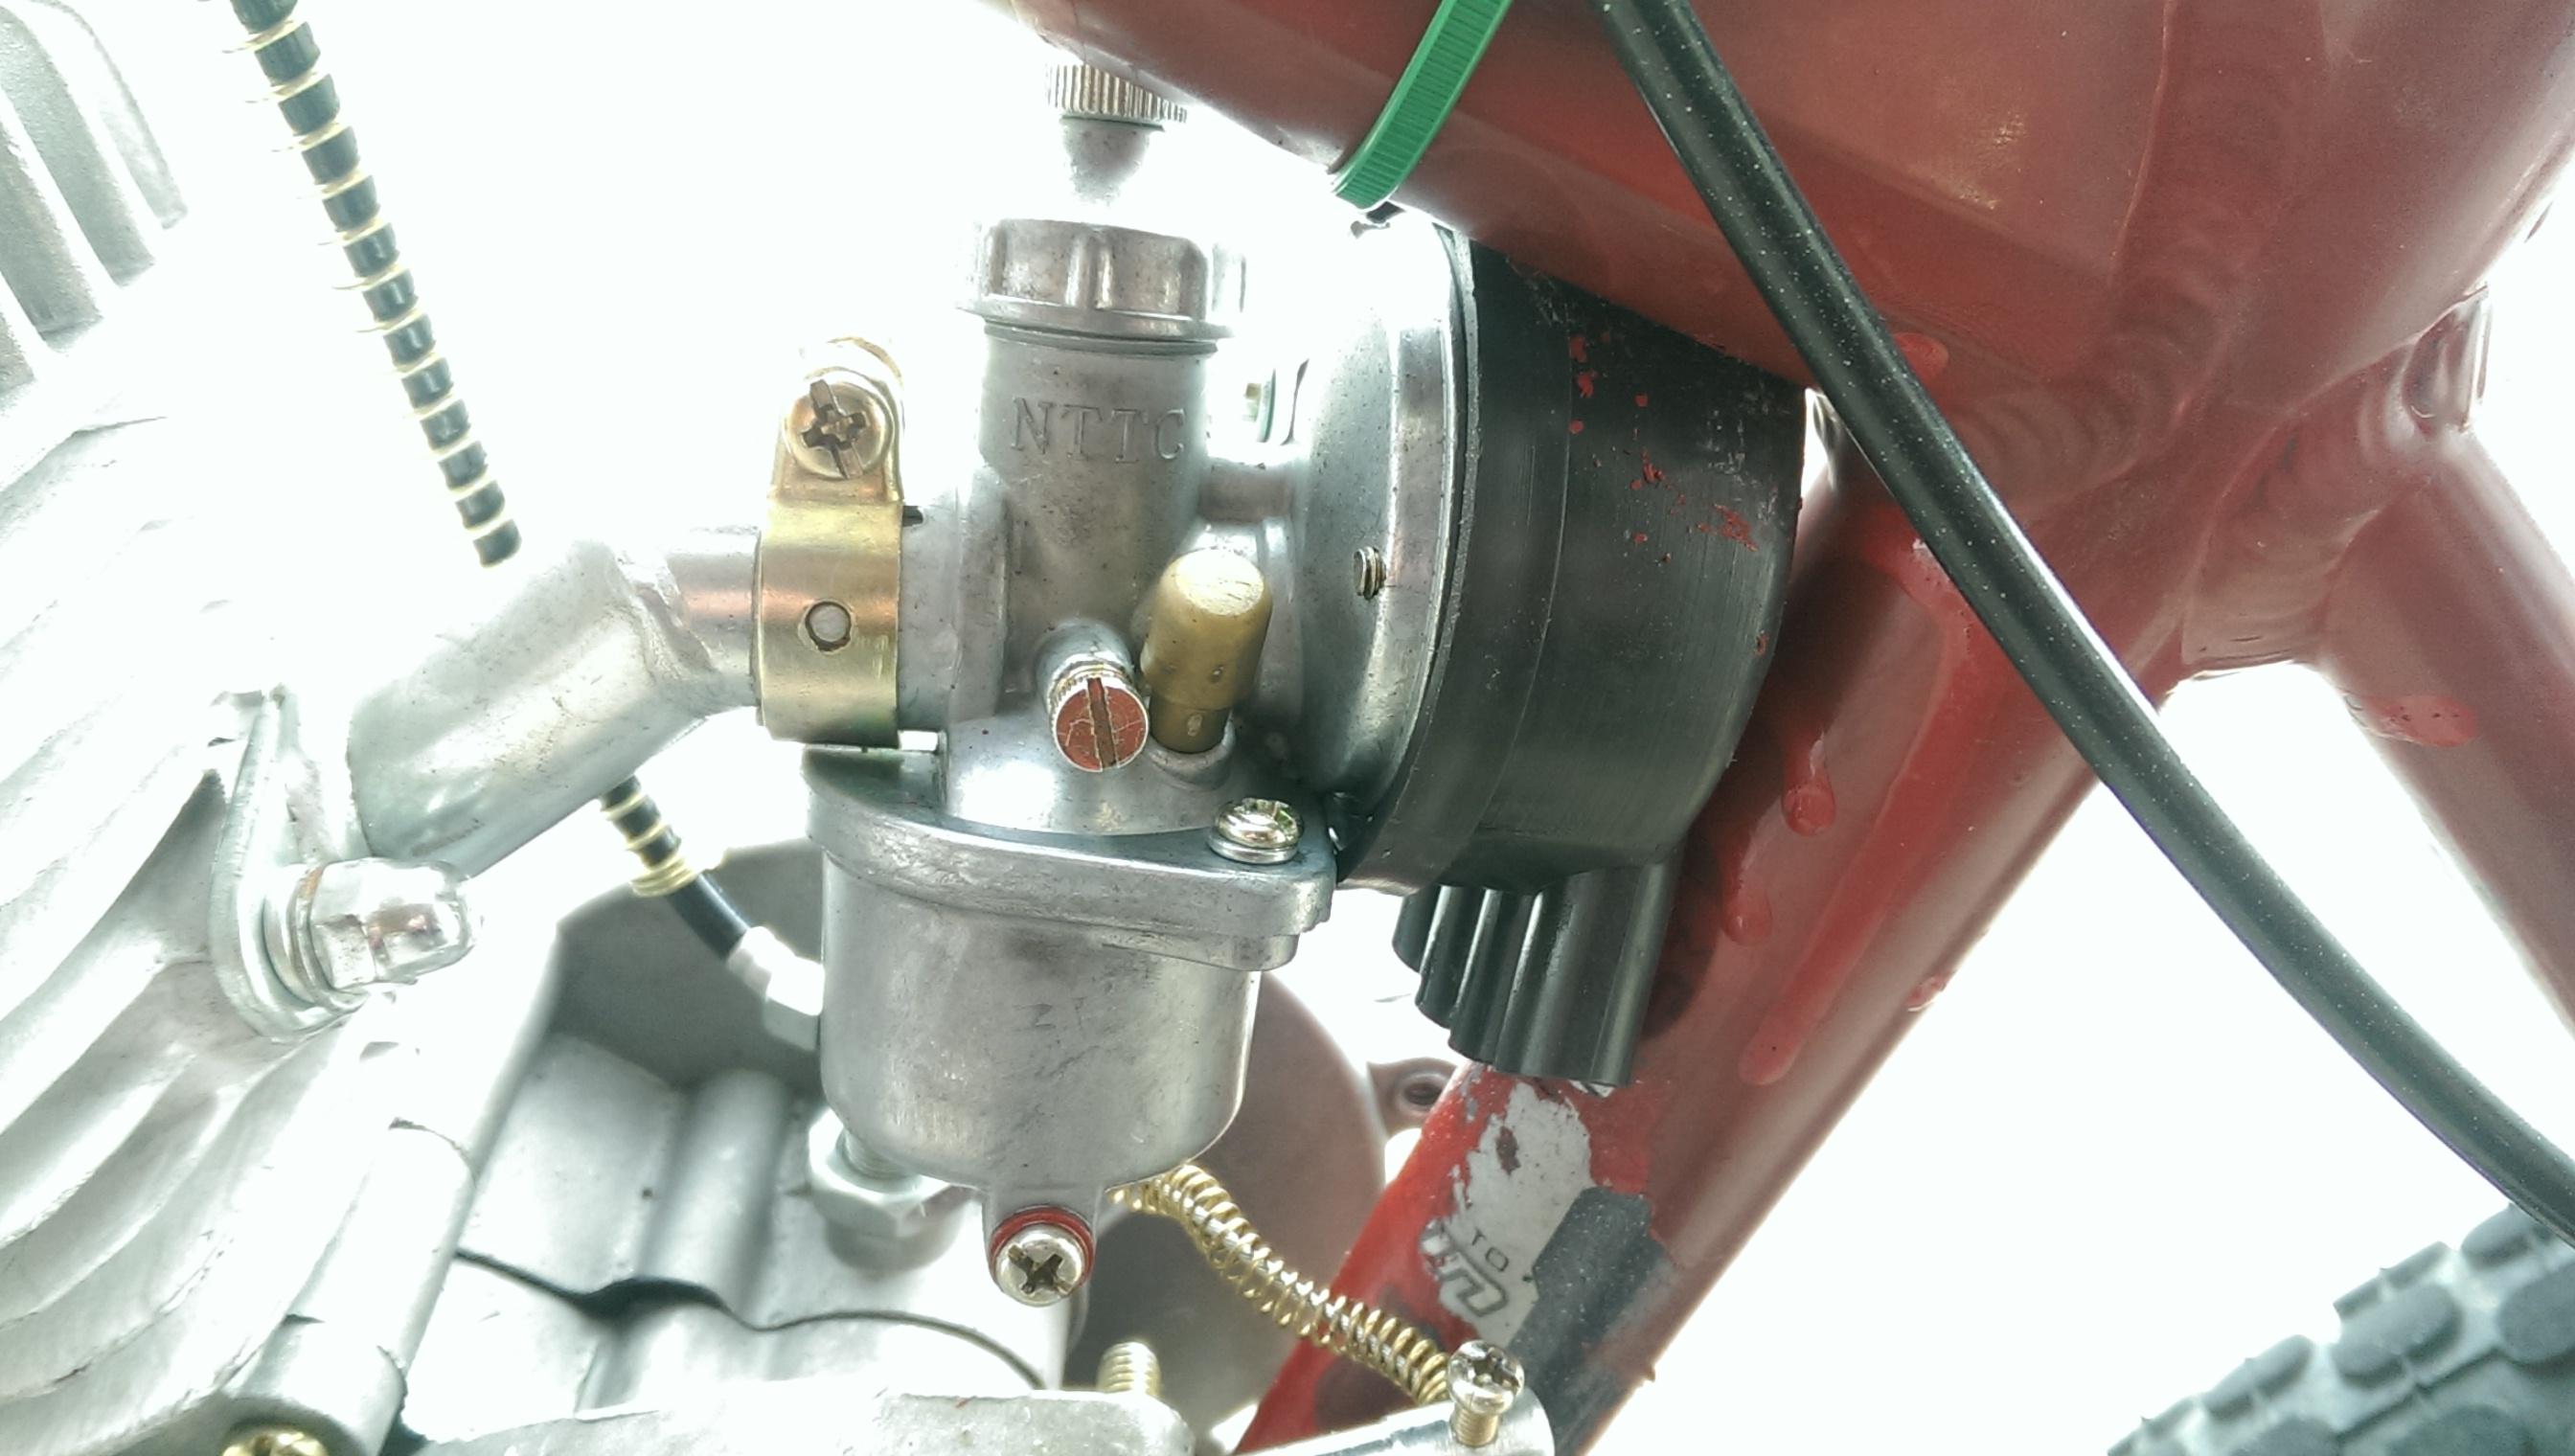
Gas Tank/Carburetor Install
- Screw the fuel stop onto the gas tank
- Use the mounting brackets that came with the kit to attach the tank to the top of the frame close to the handle bars but not touching
- Take the carburetor and attach it to the manifold (metallic tube sticking out of the engine block) so that the cable sticks straight up
- Tighten the clamp


Fuel Line Setup
- Do this Step only if your kit comes with a fuel filter (acorn shaped container made of plastic). Cut the fuel line in half and attach each to both sides of the filter
- Take the fuel line and put one side on the fuel stop and the other side on the carburetor (you may half to shorten the line so it doesn’t sag and lean against the engine)
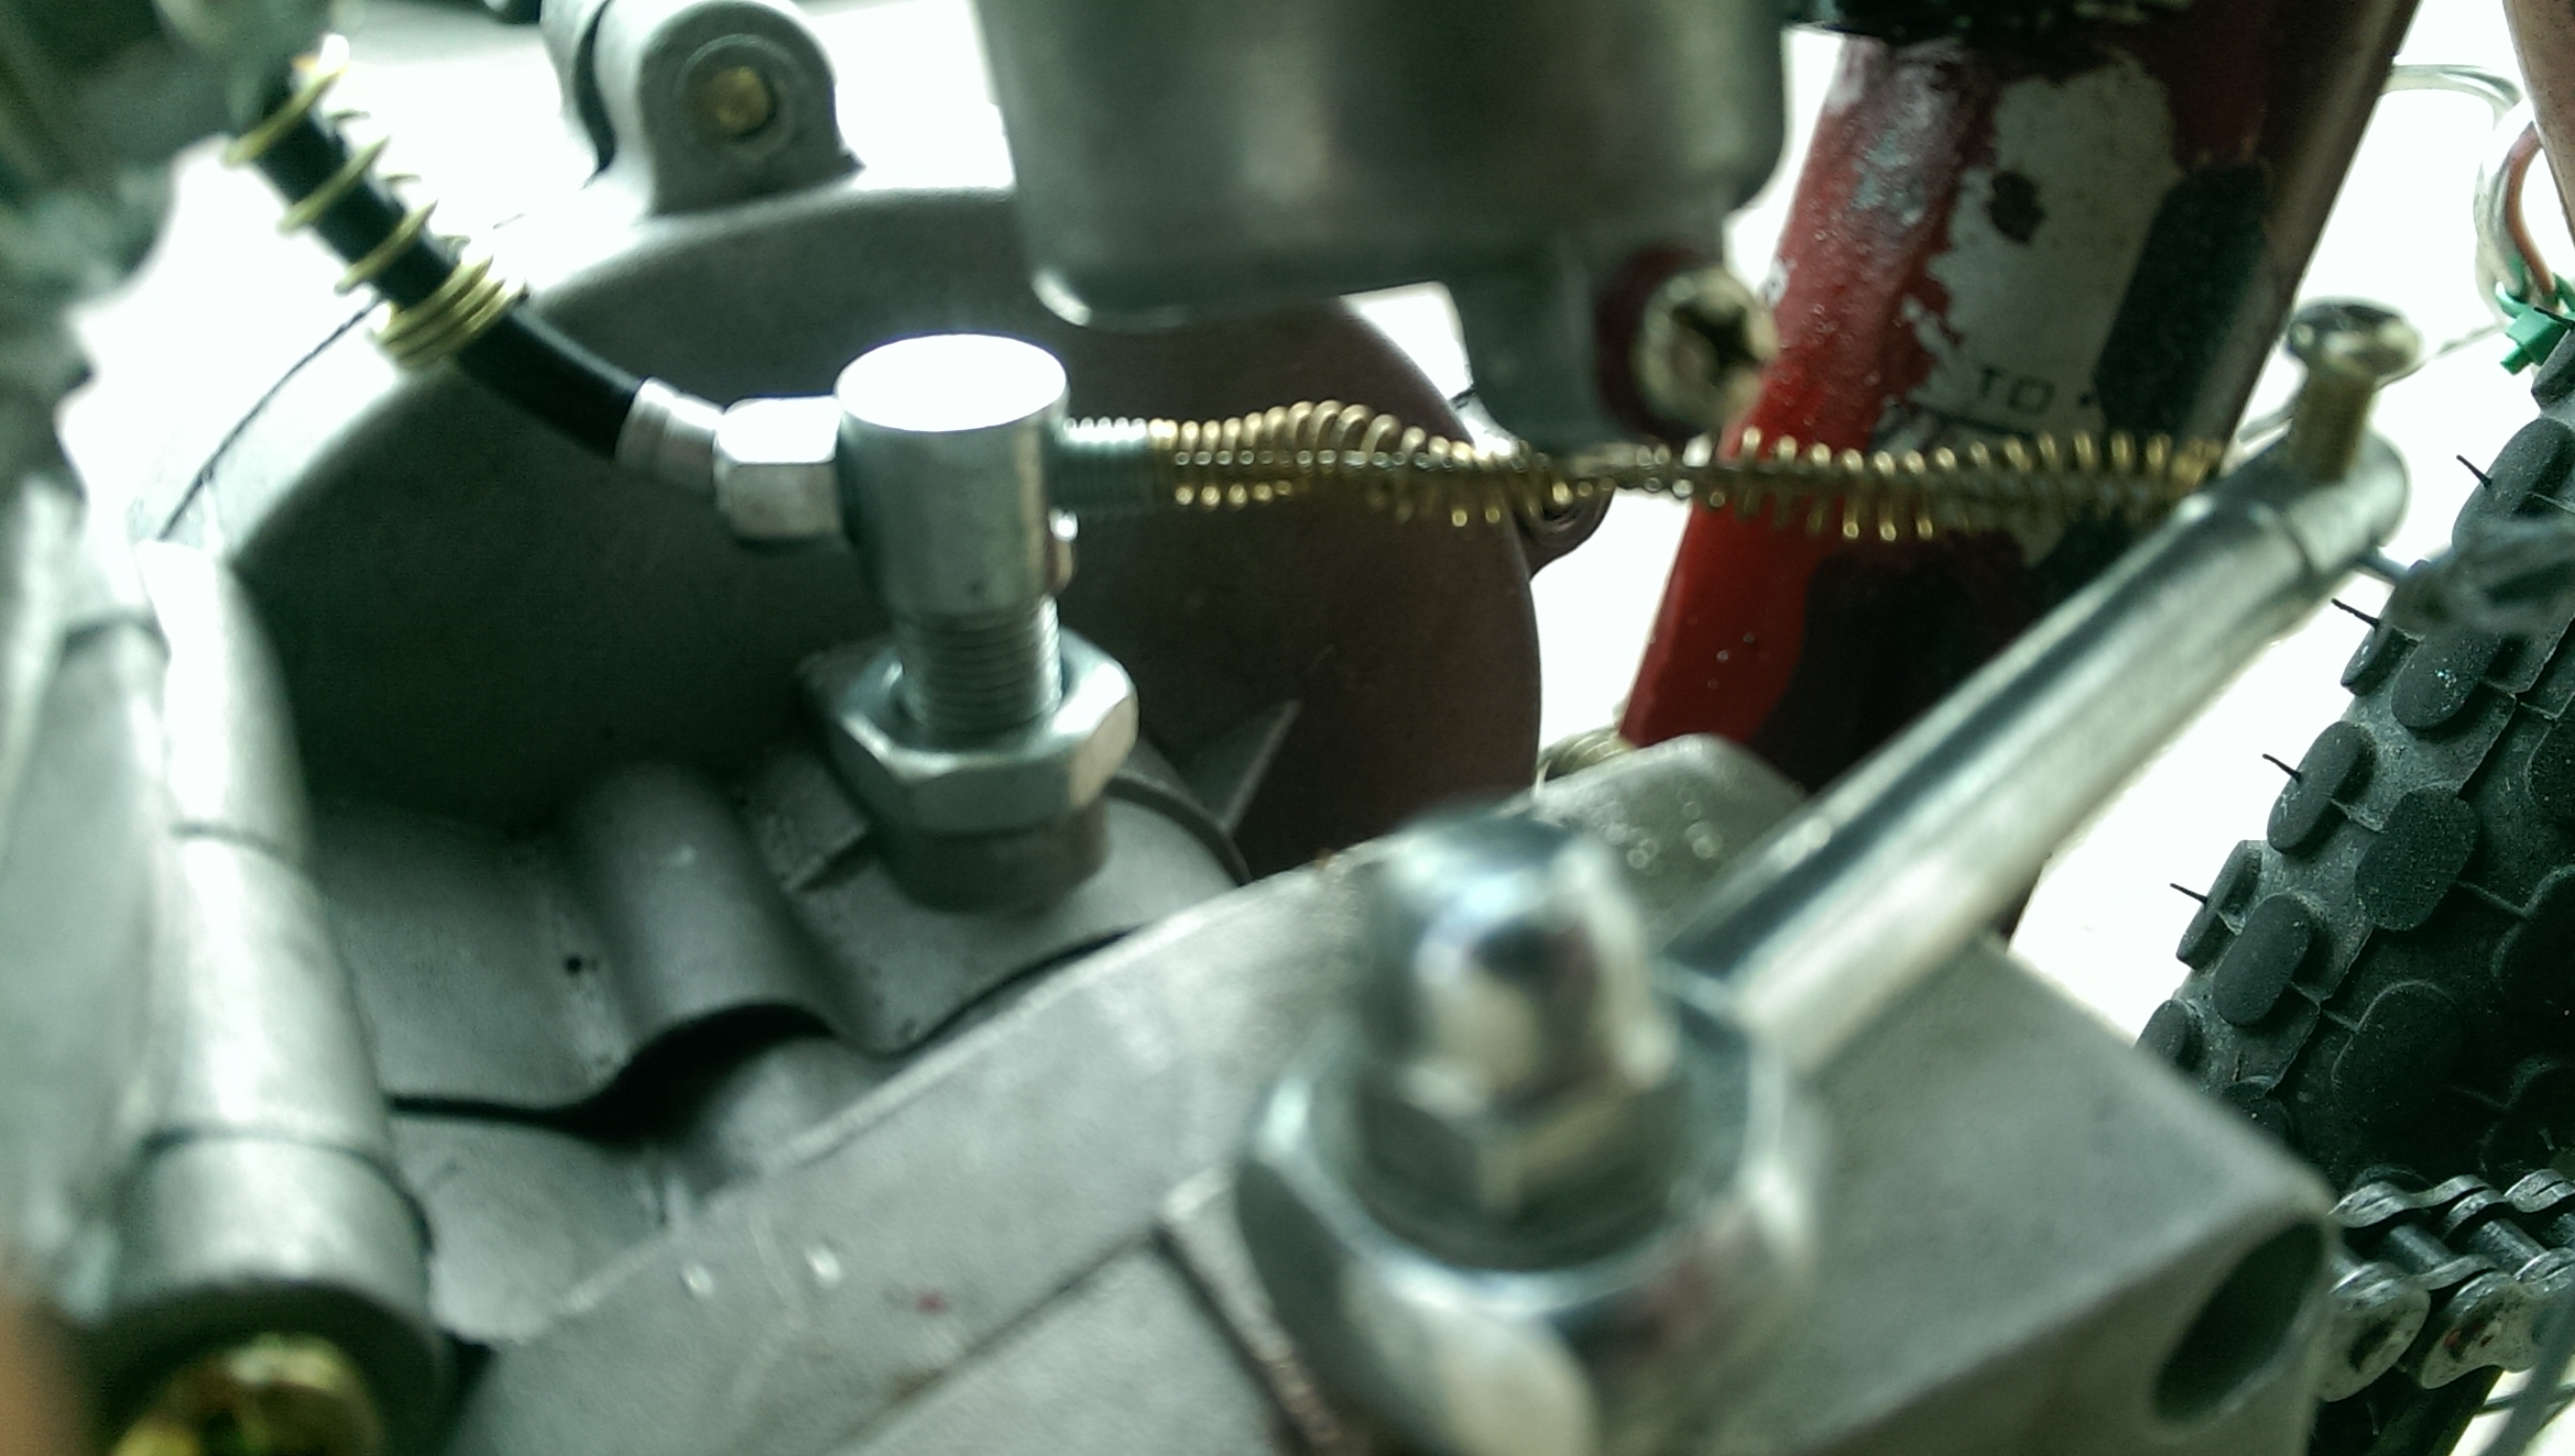
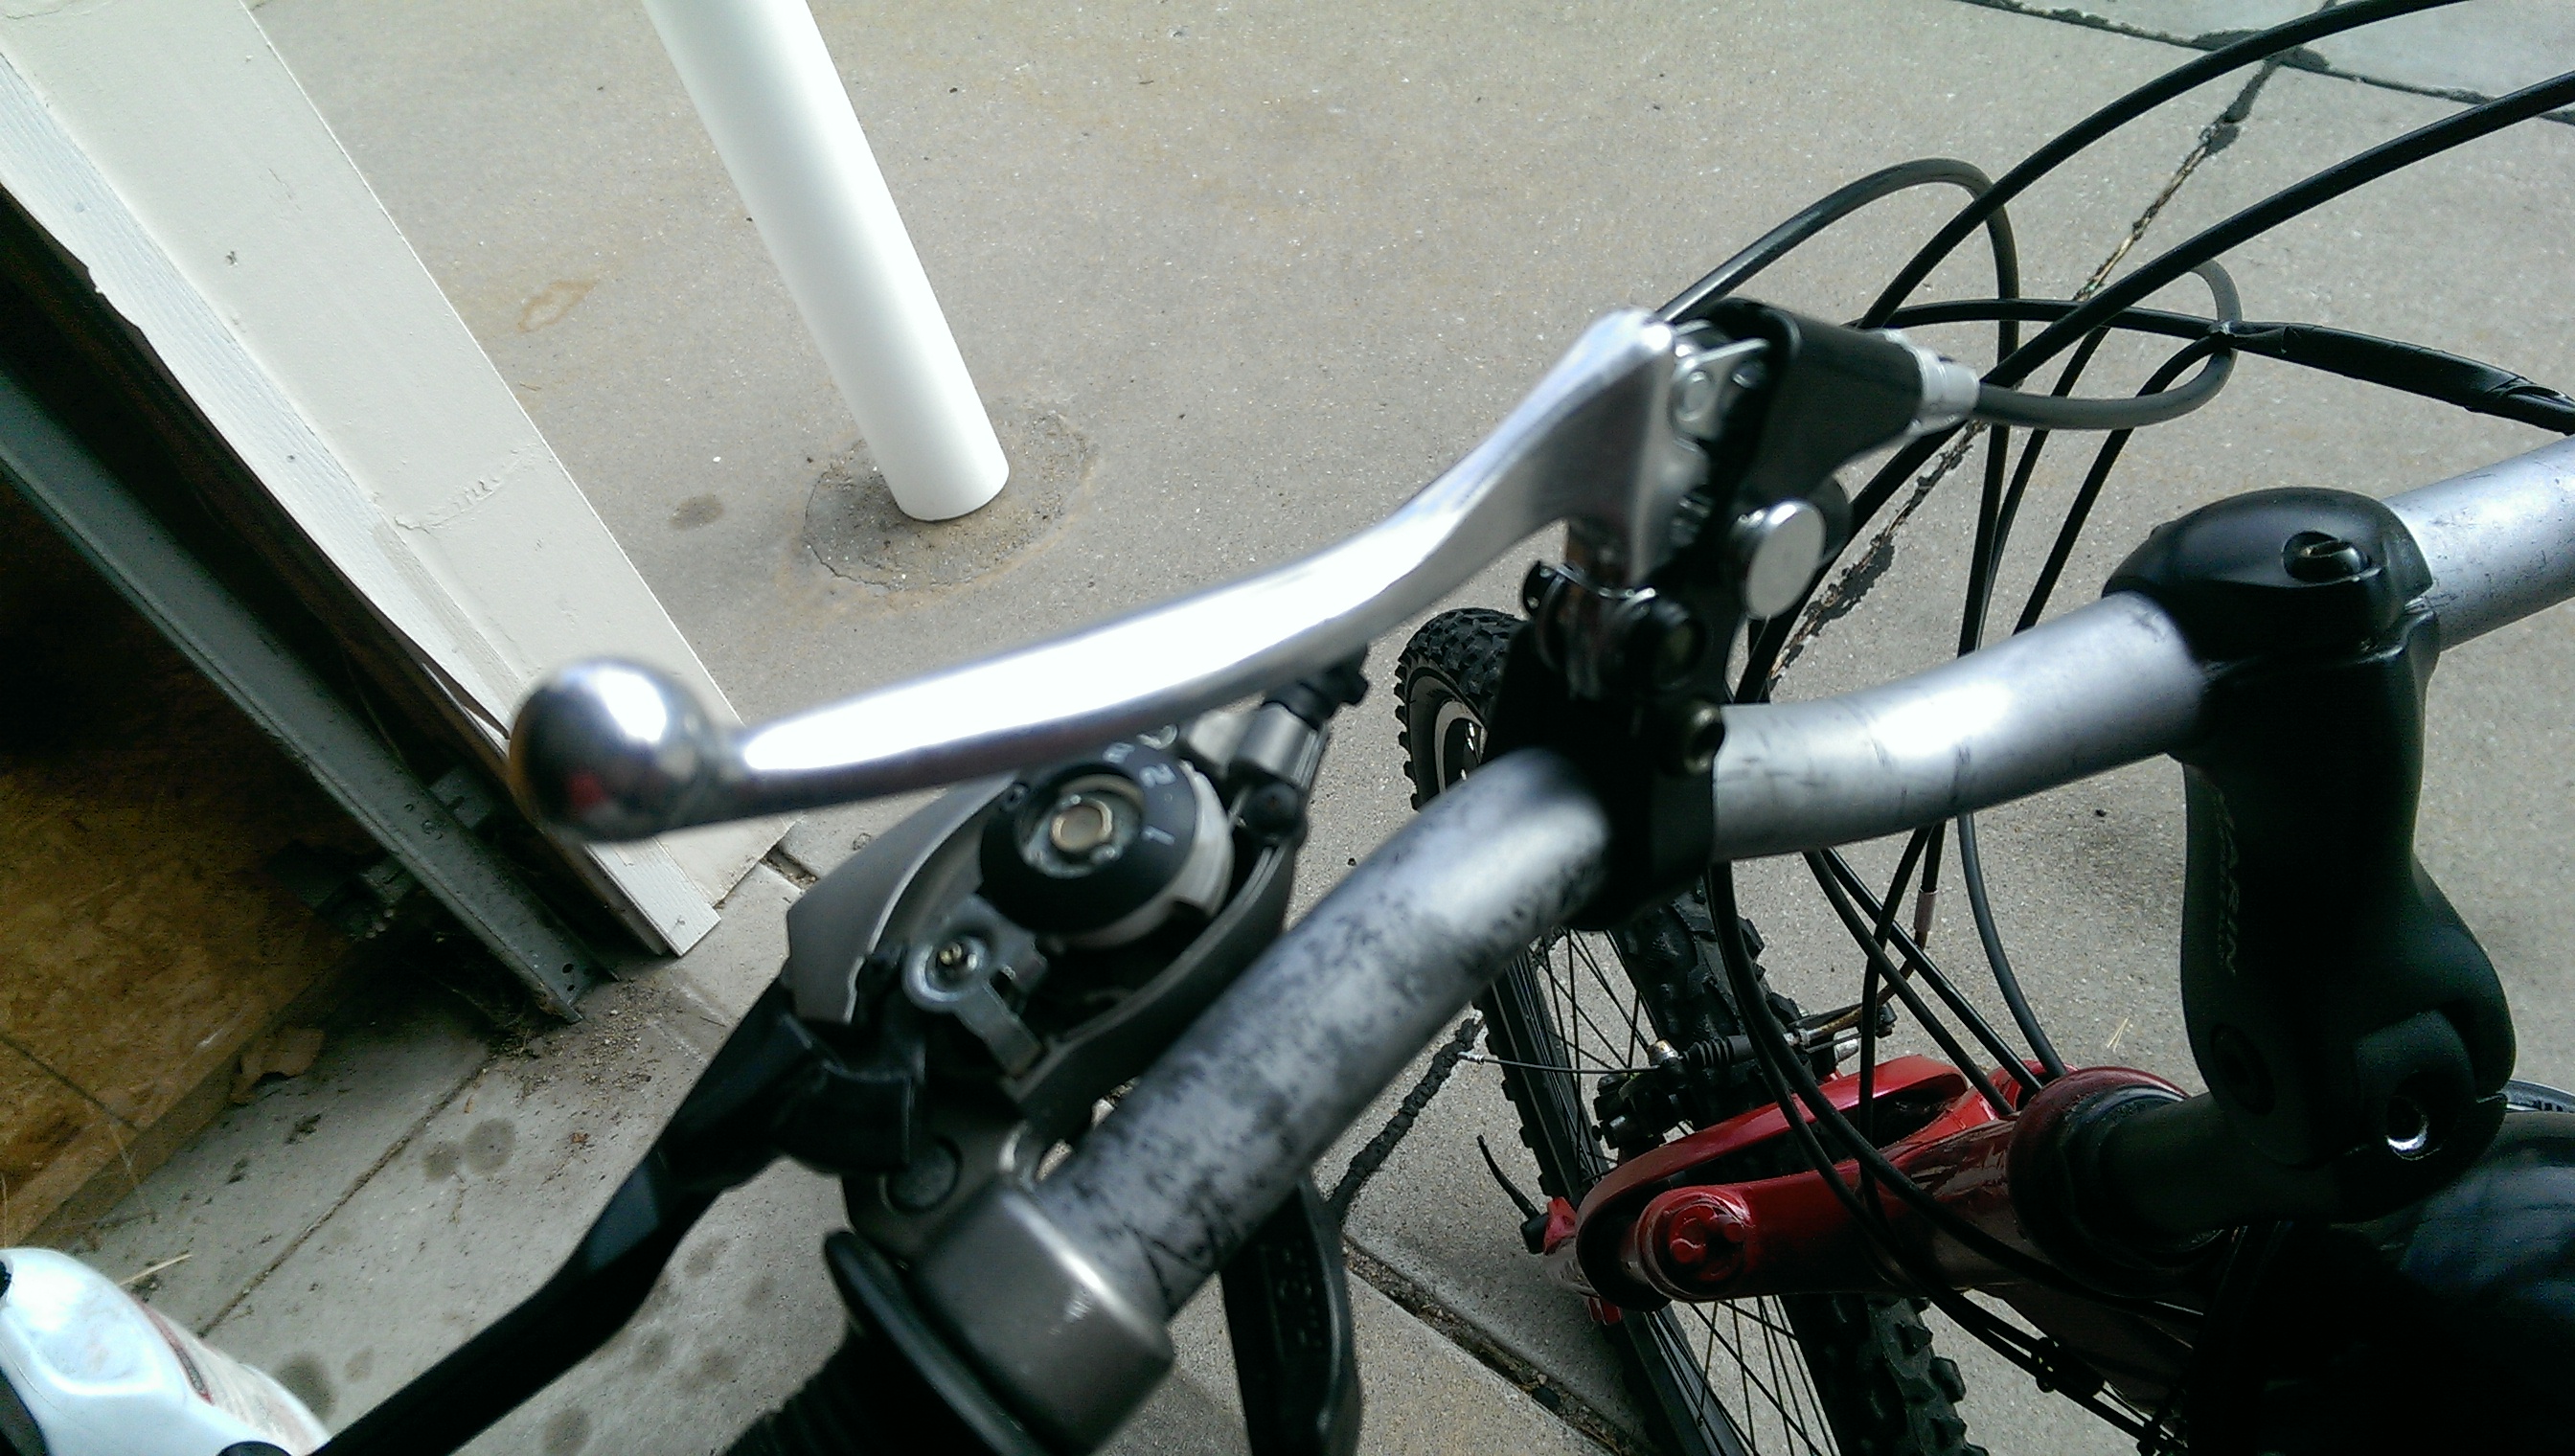
Motorized Bicycle Clutch Assembly
- The clutch is the part that looks like a hand break
- Hold the clutch open and place the clutch cable into the slot and tighten the threaded part
- Remove the break handle, if there is one, on the left side
- Slide the clutch onto the left part of the handle bar far enough so it doesn’t interfere with breaking (if there is no break then position the clutch as though it was a break handle)
- Slide the let hand grip on after the clutch
- Take the other side of the cable and slide the larger spring onto the cable
- Thread that cable through the hollow bolt in the middle area of the engine
- Slide the smaller spring onto the cable after the hollow screw
- Thread the cable through the little hole on the metal arm (after loosening the screw in the arm)
- Pull the end of the cable with a pliers until you get the spring as straight as possible
- Take a vice-grip and cable next to the arm so it doesn’t loosen
- Screw the screw in as tight as it will go
- (This will loosen over time so repeat the tightening process as needed)
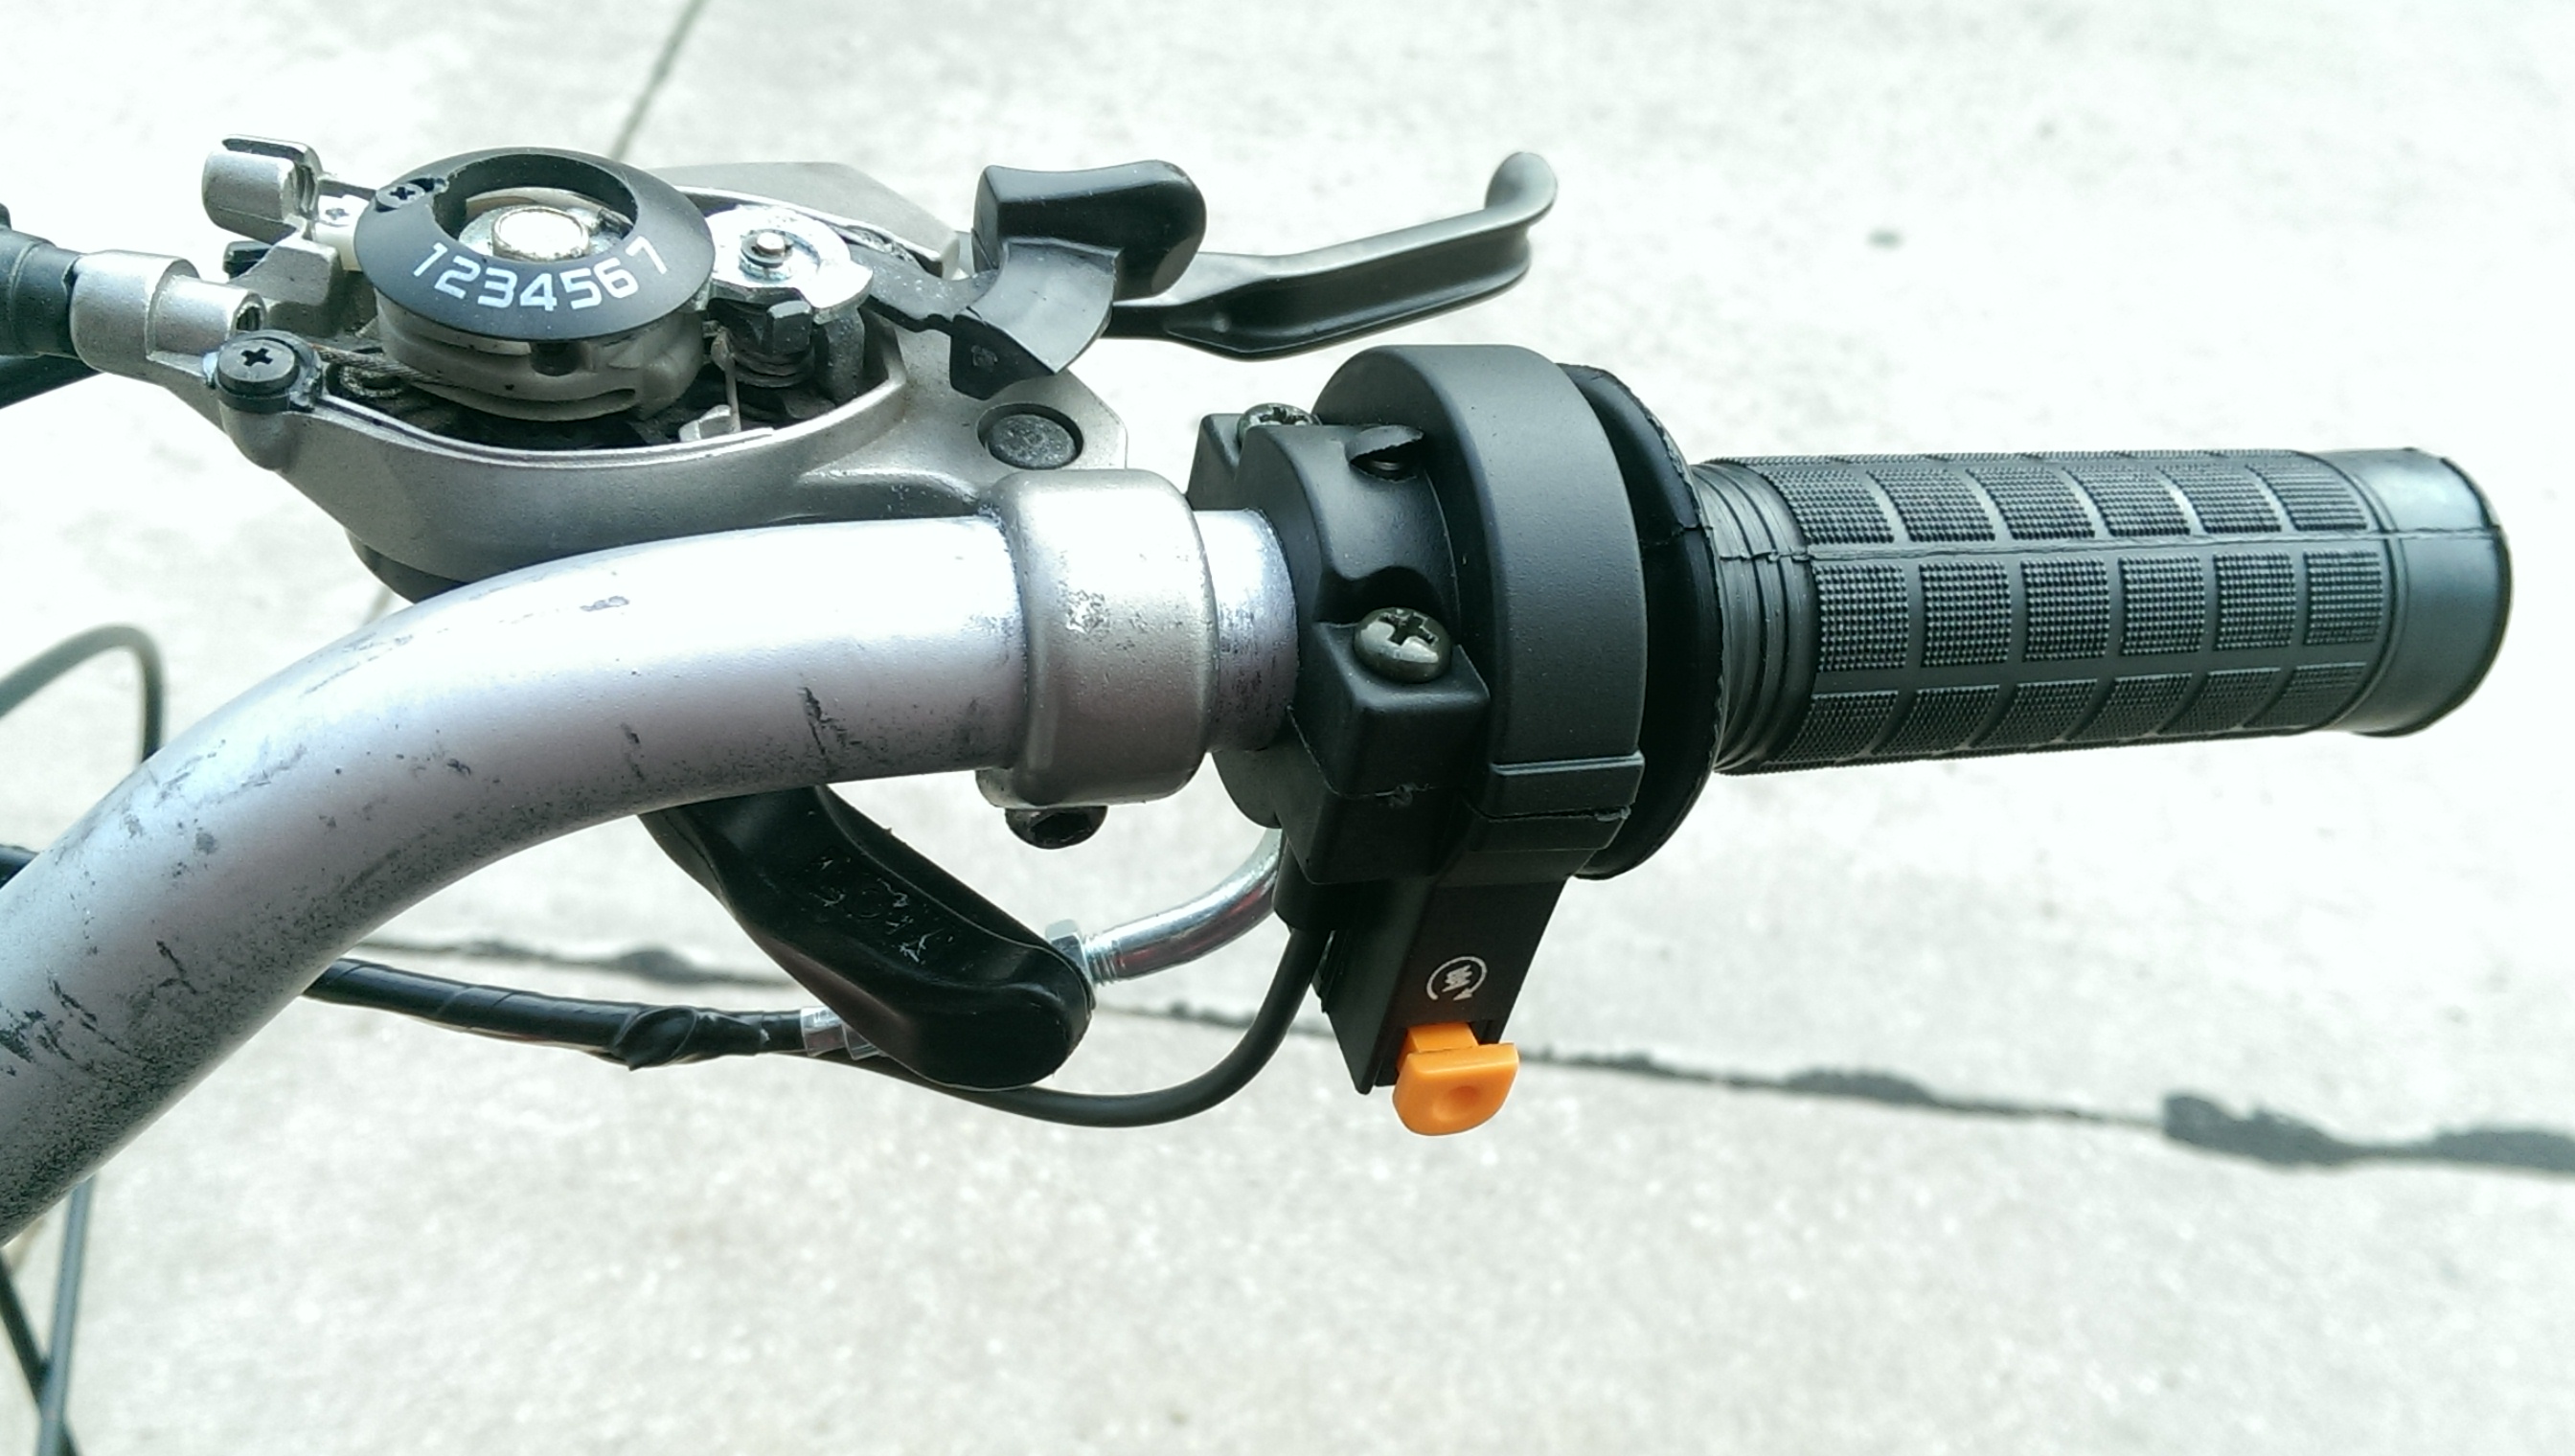
Accelerator Setup
- Slide the accelerator hand grip onto the right side of the handle bar (it will be loose)
- Screw the kill switch together over the hand grip so the grip doesn’t move
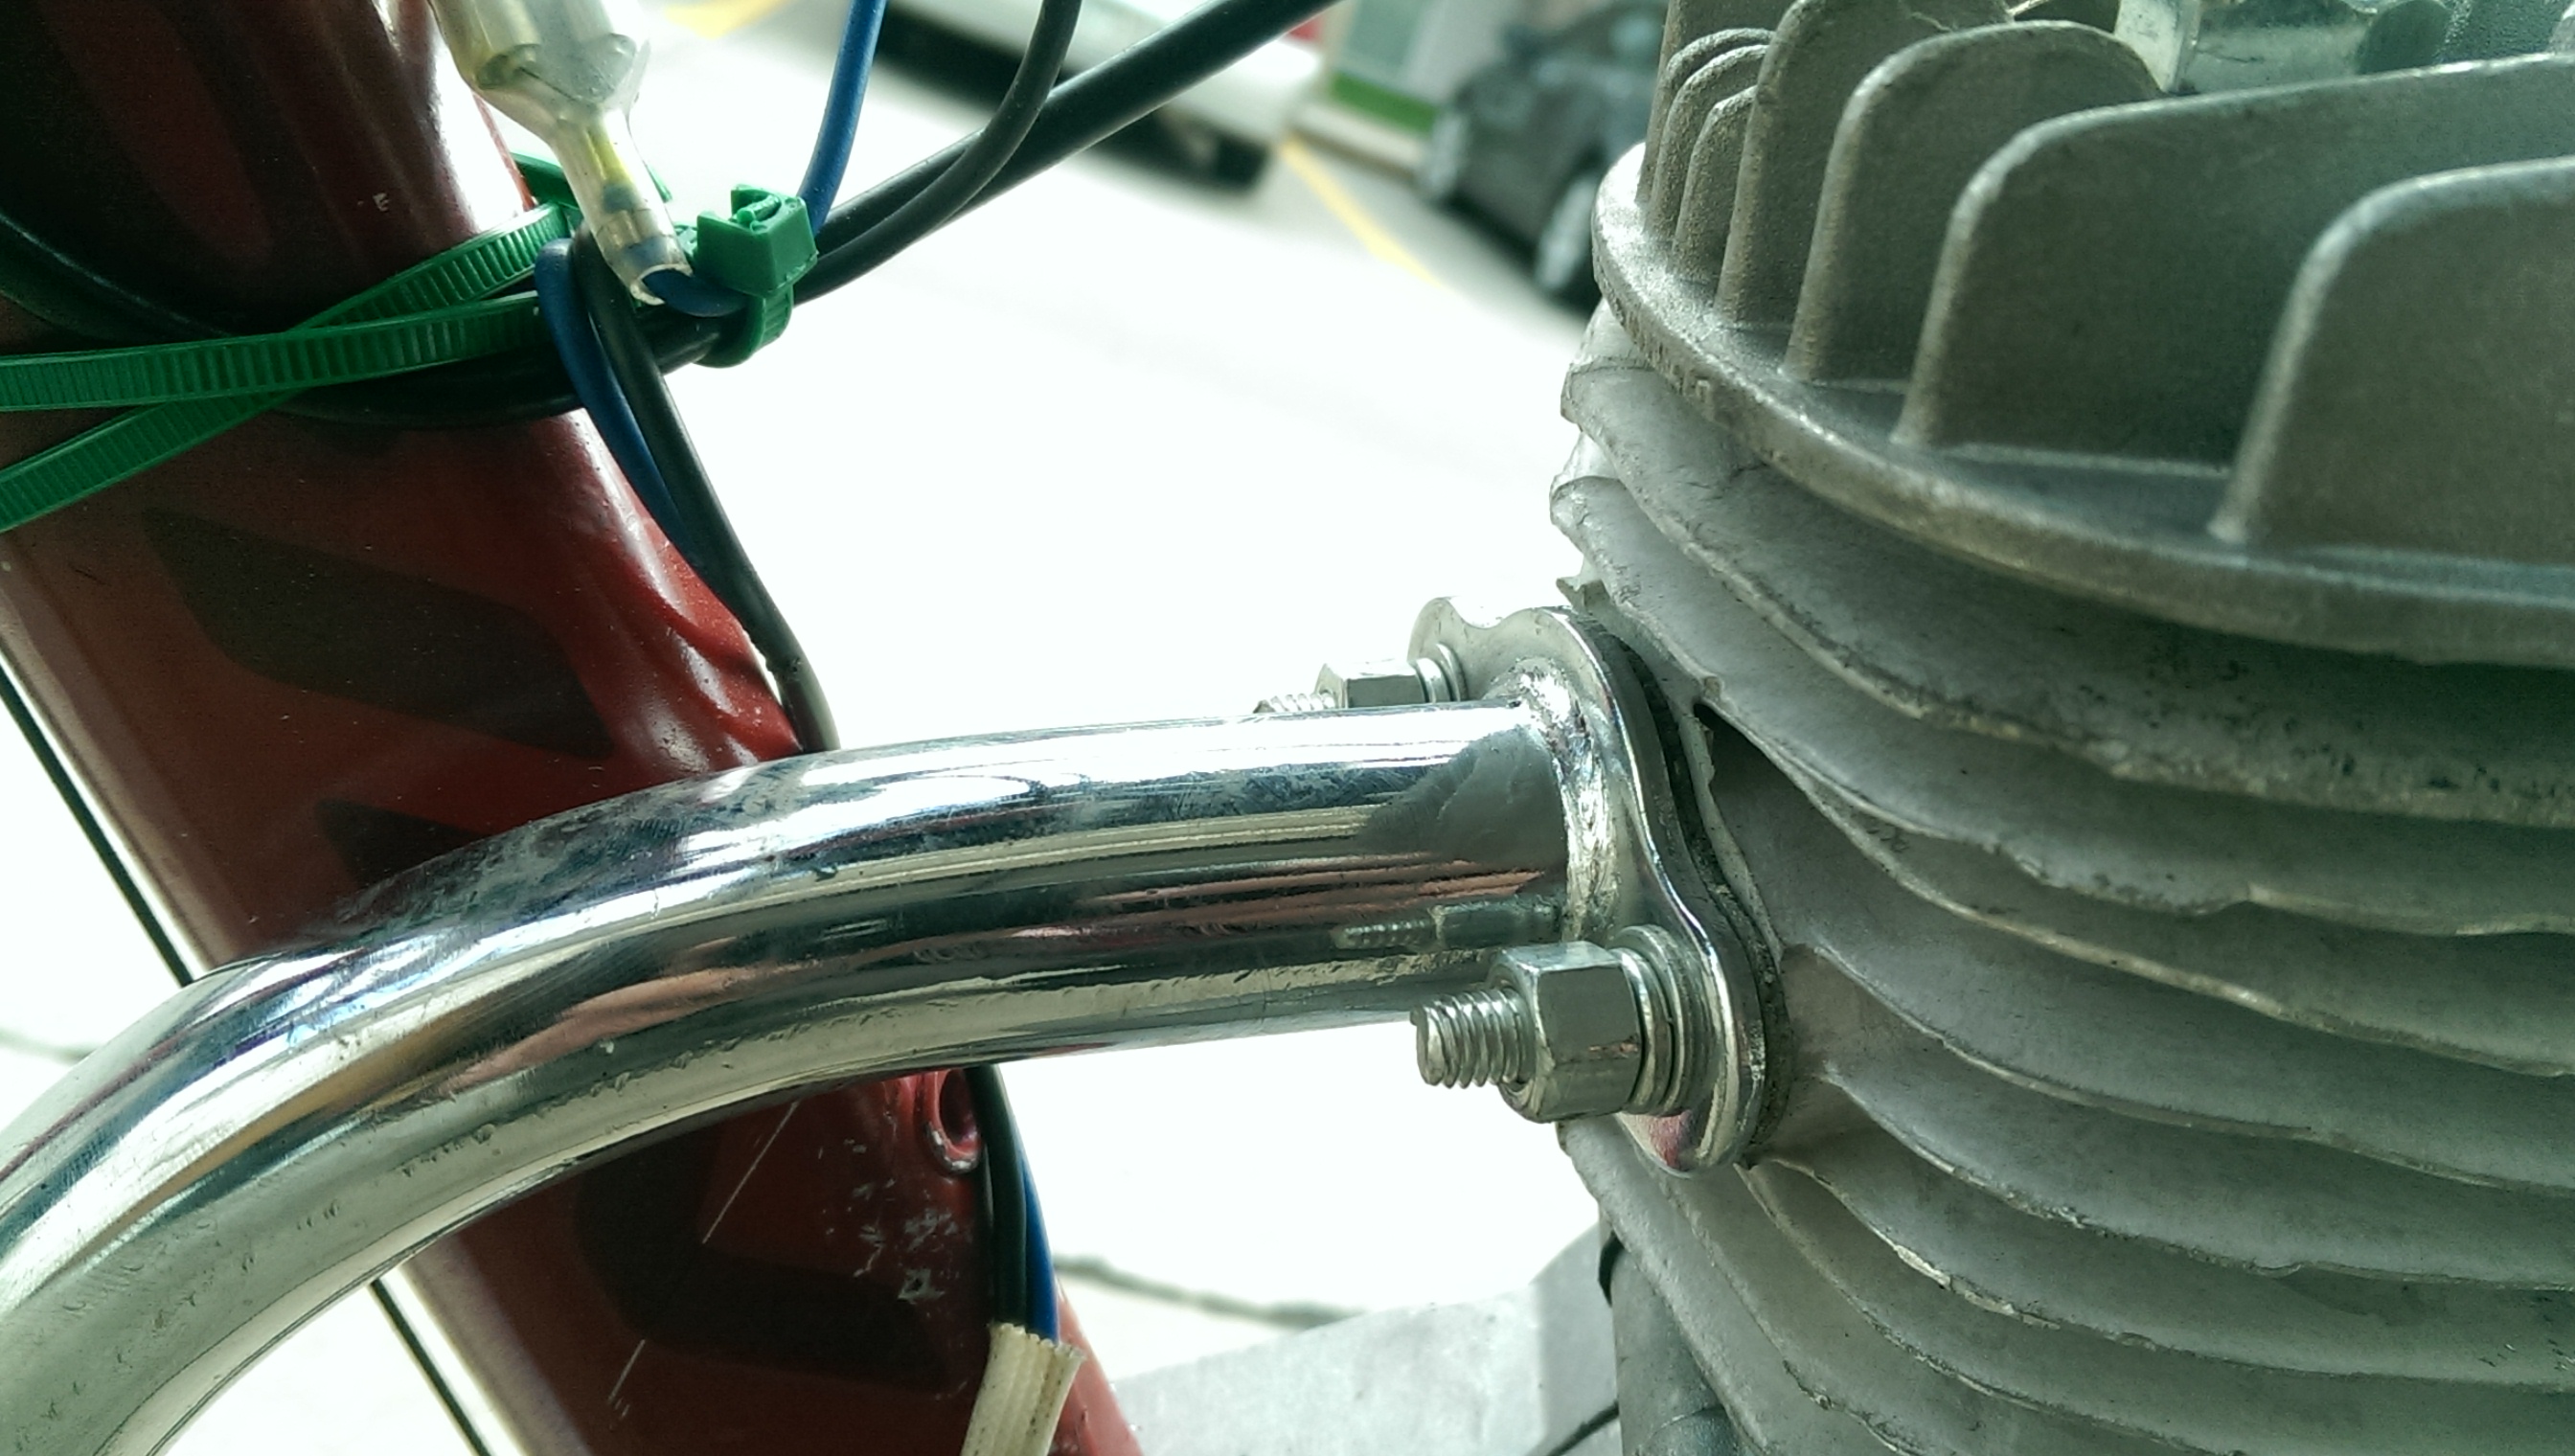
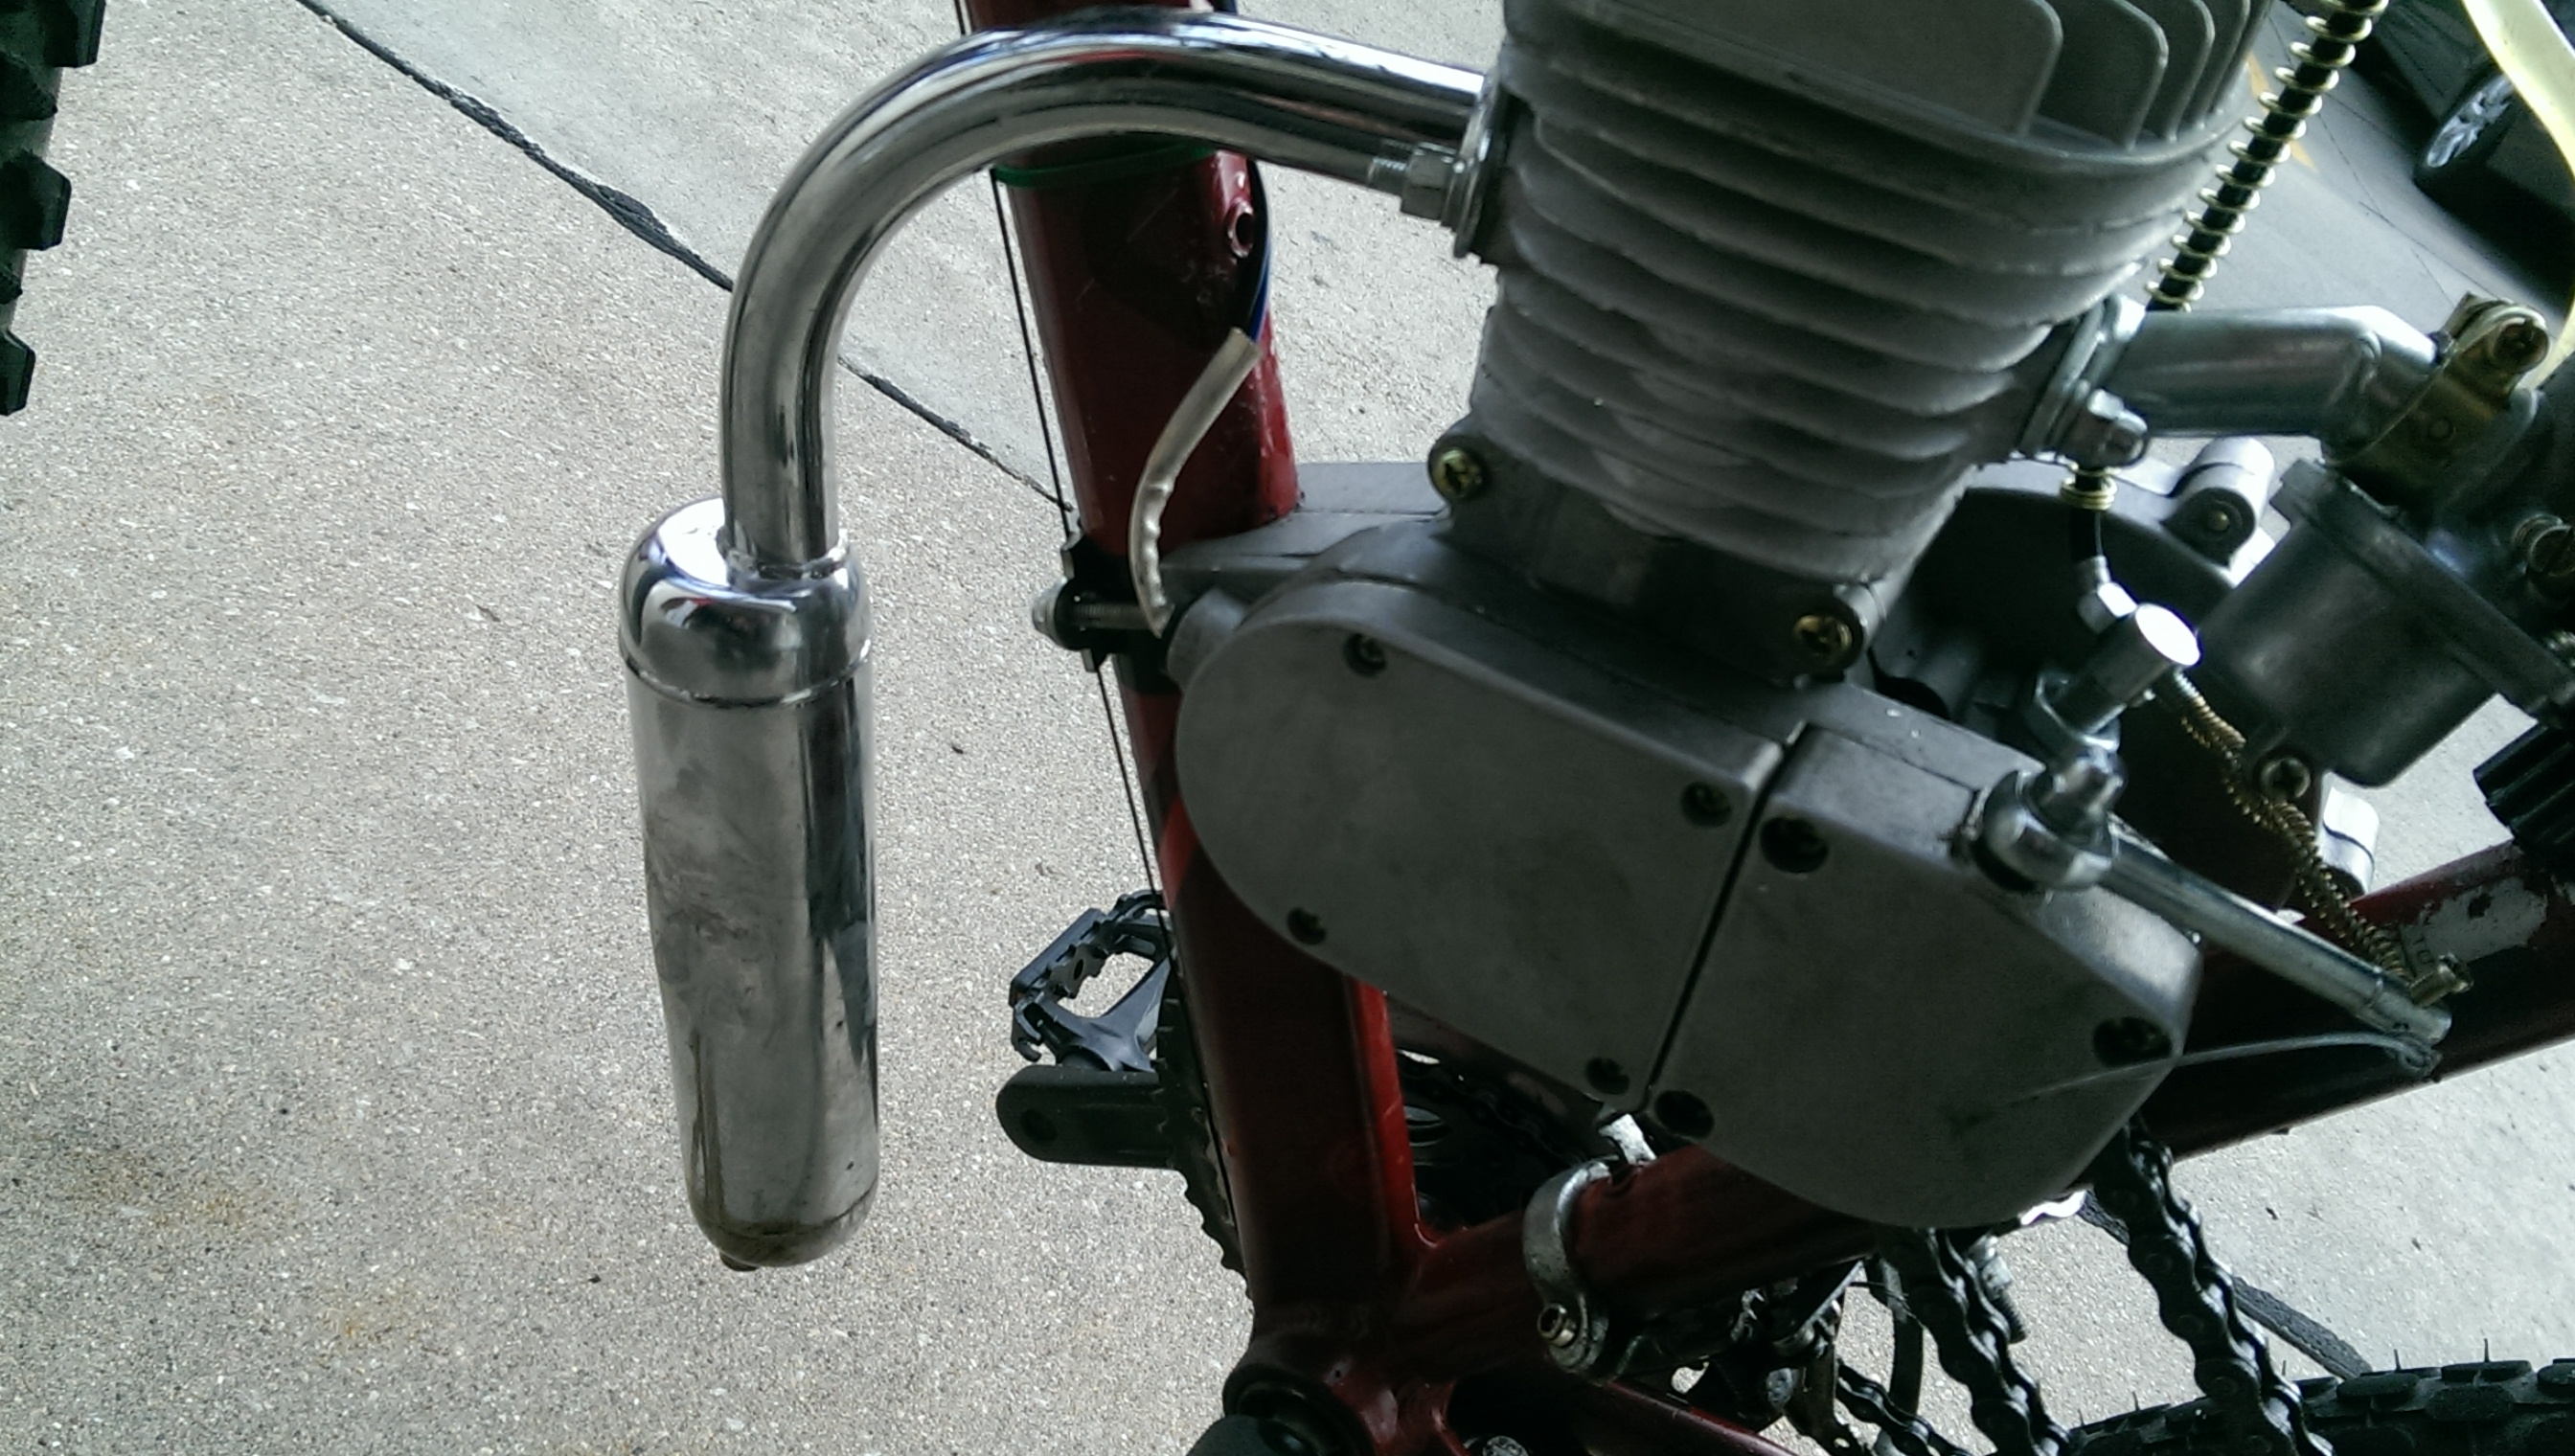
Muffler/Mount
- There are two bolts protruding from the engine in the front
- Make sure the gasket is in place (flimsy material in the shape of the end of the muffler)
- Attach the muffler to those two bolt ends
- The kit may come with a bracket to hold the muffler in place. When squeezed together it looks like a stick with two circles
- Pull the ends of the bracket apart and wrap it around the frame and muffle then bolt the end together
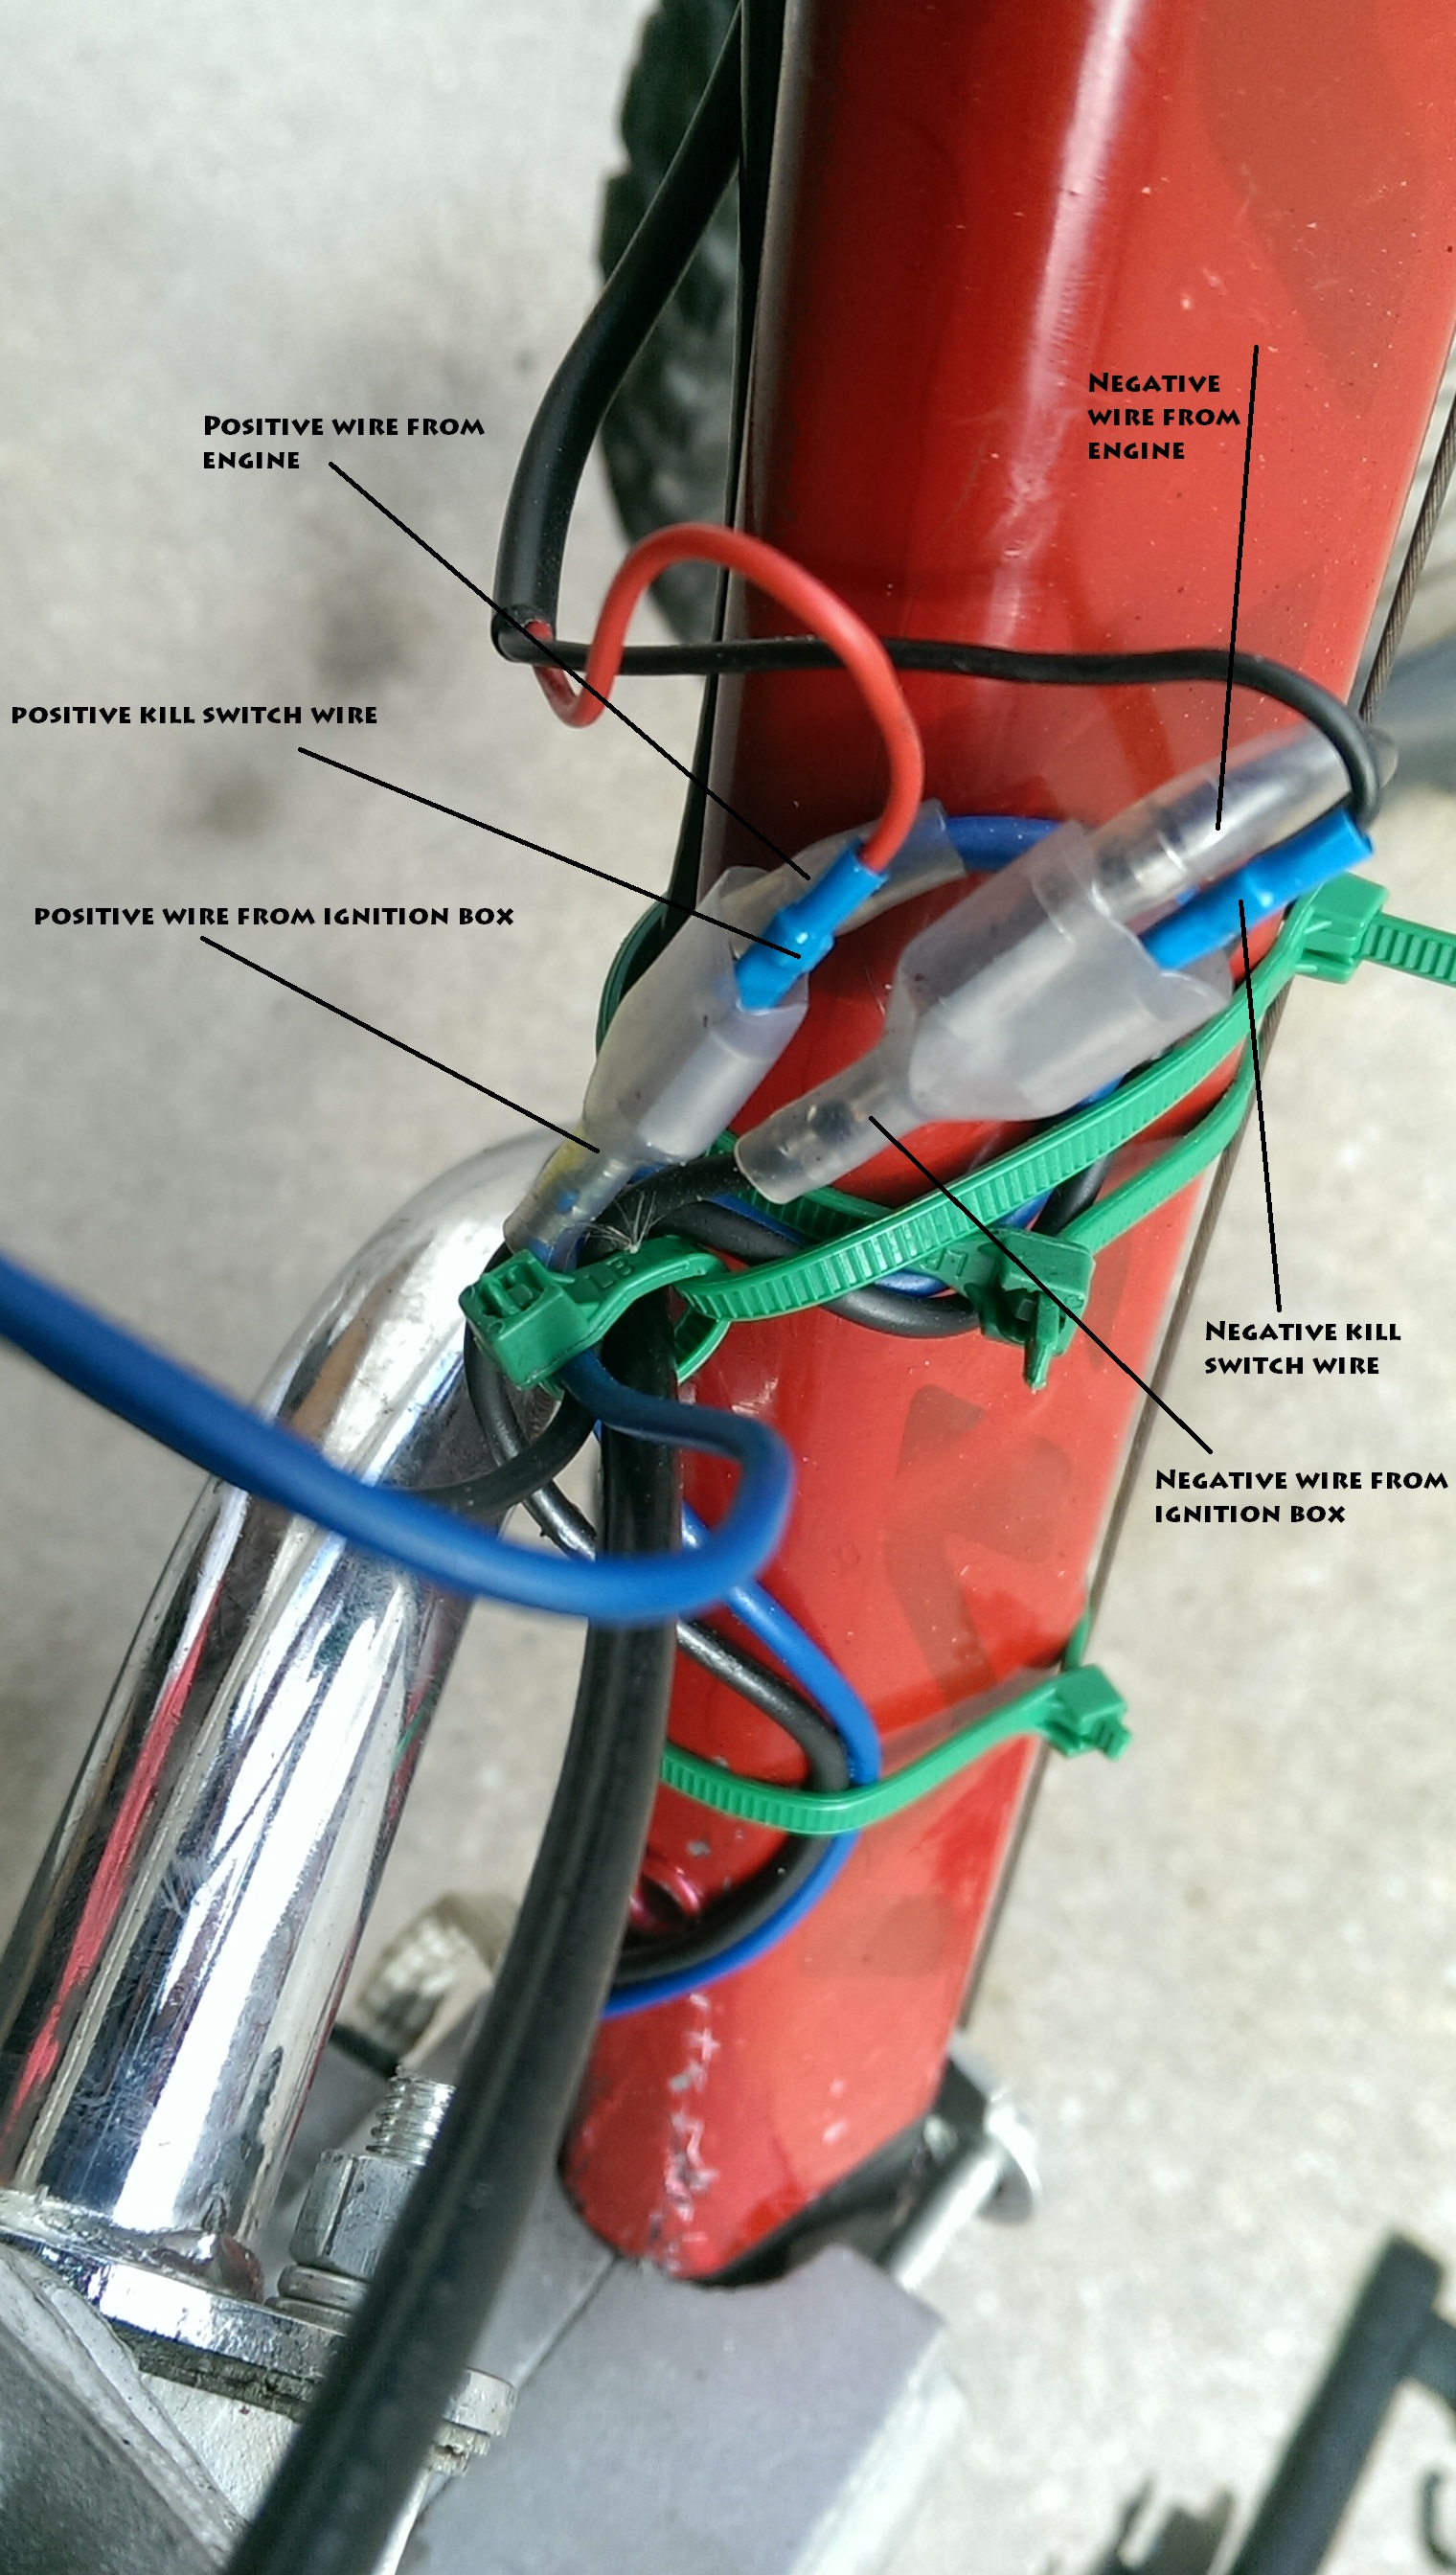
Ignition/Wiring Setup
- Bolt the distributor box onto the frame in a location so that the thick cable can reach the spark plug and plug that cable onto the spark plug
- On the engine there may be two or three wires coming out near the bottom on the drive chain side a red/blue, a black, and a white (if there are three)
- Tuck in the white wire you don’t need it for basic setup
- Attach the other cables to the two cables coming out of the ignition box
- Take the two cables from the kill switch and attach the black to the black and the red to the red/blue wire
- There should be two points where three wire points meet
Neaten
- Zip tie the cables in the middle area of the frame so that they will not interfere with pedals and so that no cables are touching the muffler or bare engine metal
Gas Prep
- For the first tank or two of fuel the ratio of gas to oil should be 16:1
- After measuring the fuel ratios fill the tank
Initial Startup
- Pull the clutch in and lock it in with the button on it
- Open the choke (switch on the carburetor)
- Unscrew the little screw on the carburetor until the spring is not compressed a lot
- Open the fuel stop and the filter should fill with fuel
- Ride the bike to a quick jog pace and then release the clutch
- If the back tire stops and the chain locks up and you fly forward something went wrong
- The engine should turn over
- Continue pedaling
- Two things may happen the engine might start after a few bike lengths or the bike will slow, the motor will slow enough and the bike stop quickly
- If the bike didn’t start move the choke to the other end (it may not be labeled so you’ll have to play with it a little) and repeat
- If it still doesn’t start spray some starter fluid into the carburetor and try starting the bike again try this once with the choke one way and once with the choke the other way
- The way that starts the engine will tell you what way to position the choke
- If it started with the starter fluid try again without the fluid and it should start if not you aren’t getting fuel to the engine
- The best you can do is check the connections and bolts and
- When it starts up rev the accelerator some to get the fuel flowing and ride your now motorized bicycle to your hearts content
- The first start up is always the best
Additional Notes
- When riding your motorized bicycle be careful with the accelerator remember the engine is only 3-6 horse power and the bike will gradually accelerate
- Be careful when braking
- Remember the engine is tied to the rear wheel so the slower the bike is moving the slower the engine is turning and going too slow will shut the engine down so lock down the clutch when slowing to a stop or near stop
That’s all I have for now remember anyone can build a motorized bicycle, novice or expert it only takes patience and in the end it really is worth it.
/Here’s a link to one of the kits I used
Well Respect http://www.thebrocave.com cool all done!
Useful information will be) especially for young boys))
Oh Christmas with all the guests http://www.thebrocave.com!
I’m in the process of trying this out for myself. I’ll let you know how it goes!